Operating System (OS)
This guide is oriented towards Ubuntu-based Linux distributions. However, the guide may be adapted for other distributions.
Create Bootable USB
Rufus (Windows)
- Download and install Rufus
- Download the Ubuntu image file (https://releases.ubuntu.com/)
- Select your USB stick for the Device option
- Select the Ubuntu image file for the Boot selection option
- (optional) Disable quick format and/or Enable check device for bad blocks
- Press the Start button
Linux
- Open the Make Startup Disk application
- Download the Ubuntu image file (https://releases.ubuntu.com/)
- Select the Ubuntu image file for the CD-Drive/Image option
- Select your USB stick for the Device option
- Make Startup Disk
Installation
- Power on or reboot your computer
- Press Del or Esc key continuously (depends on the computer maker) to enter into BIOS menu
- BIOS Setup Boot Select the USB drive as the first boot option
- Save the changes and exit the boot screen
- Select Try or Install Ubuntu
- Open the Install Ubuntu 24.04.2 LTS desktop application

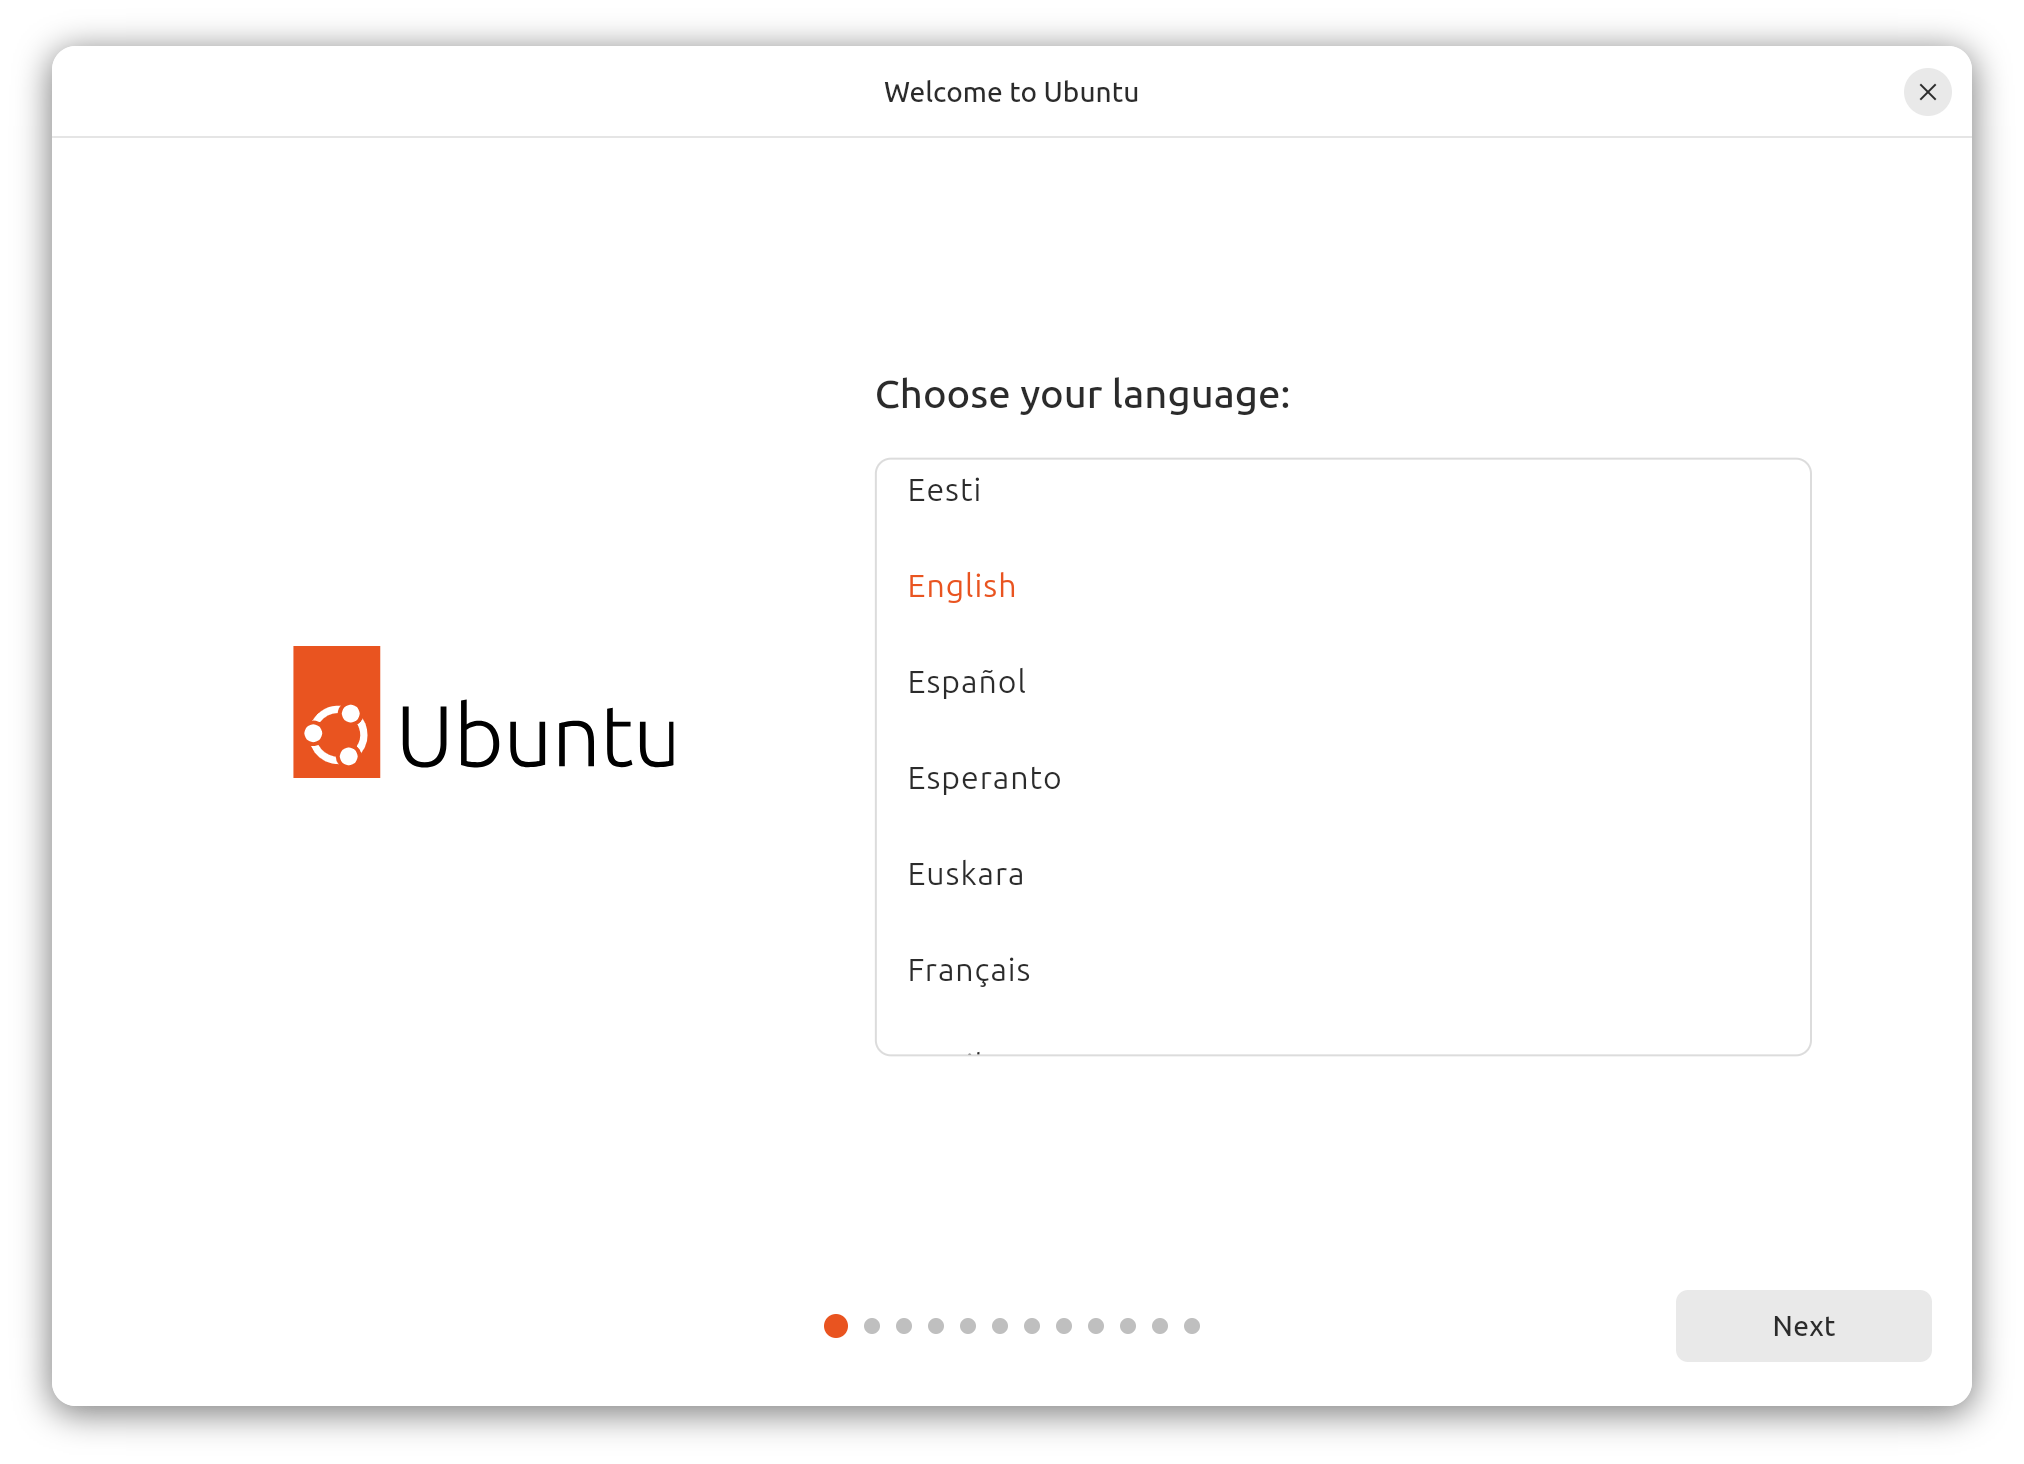
- Select the OS language
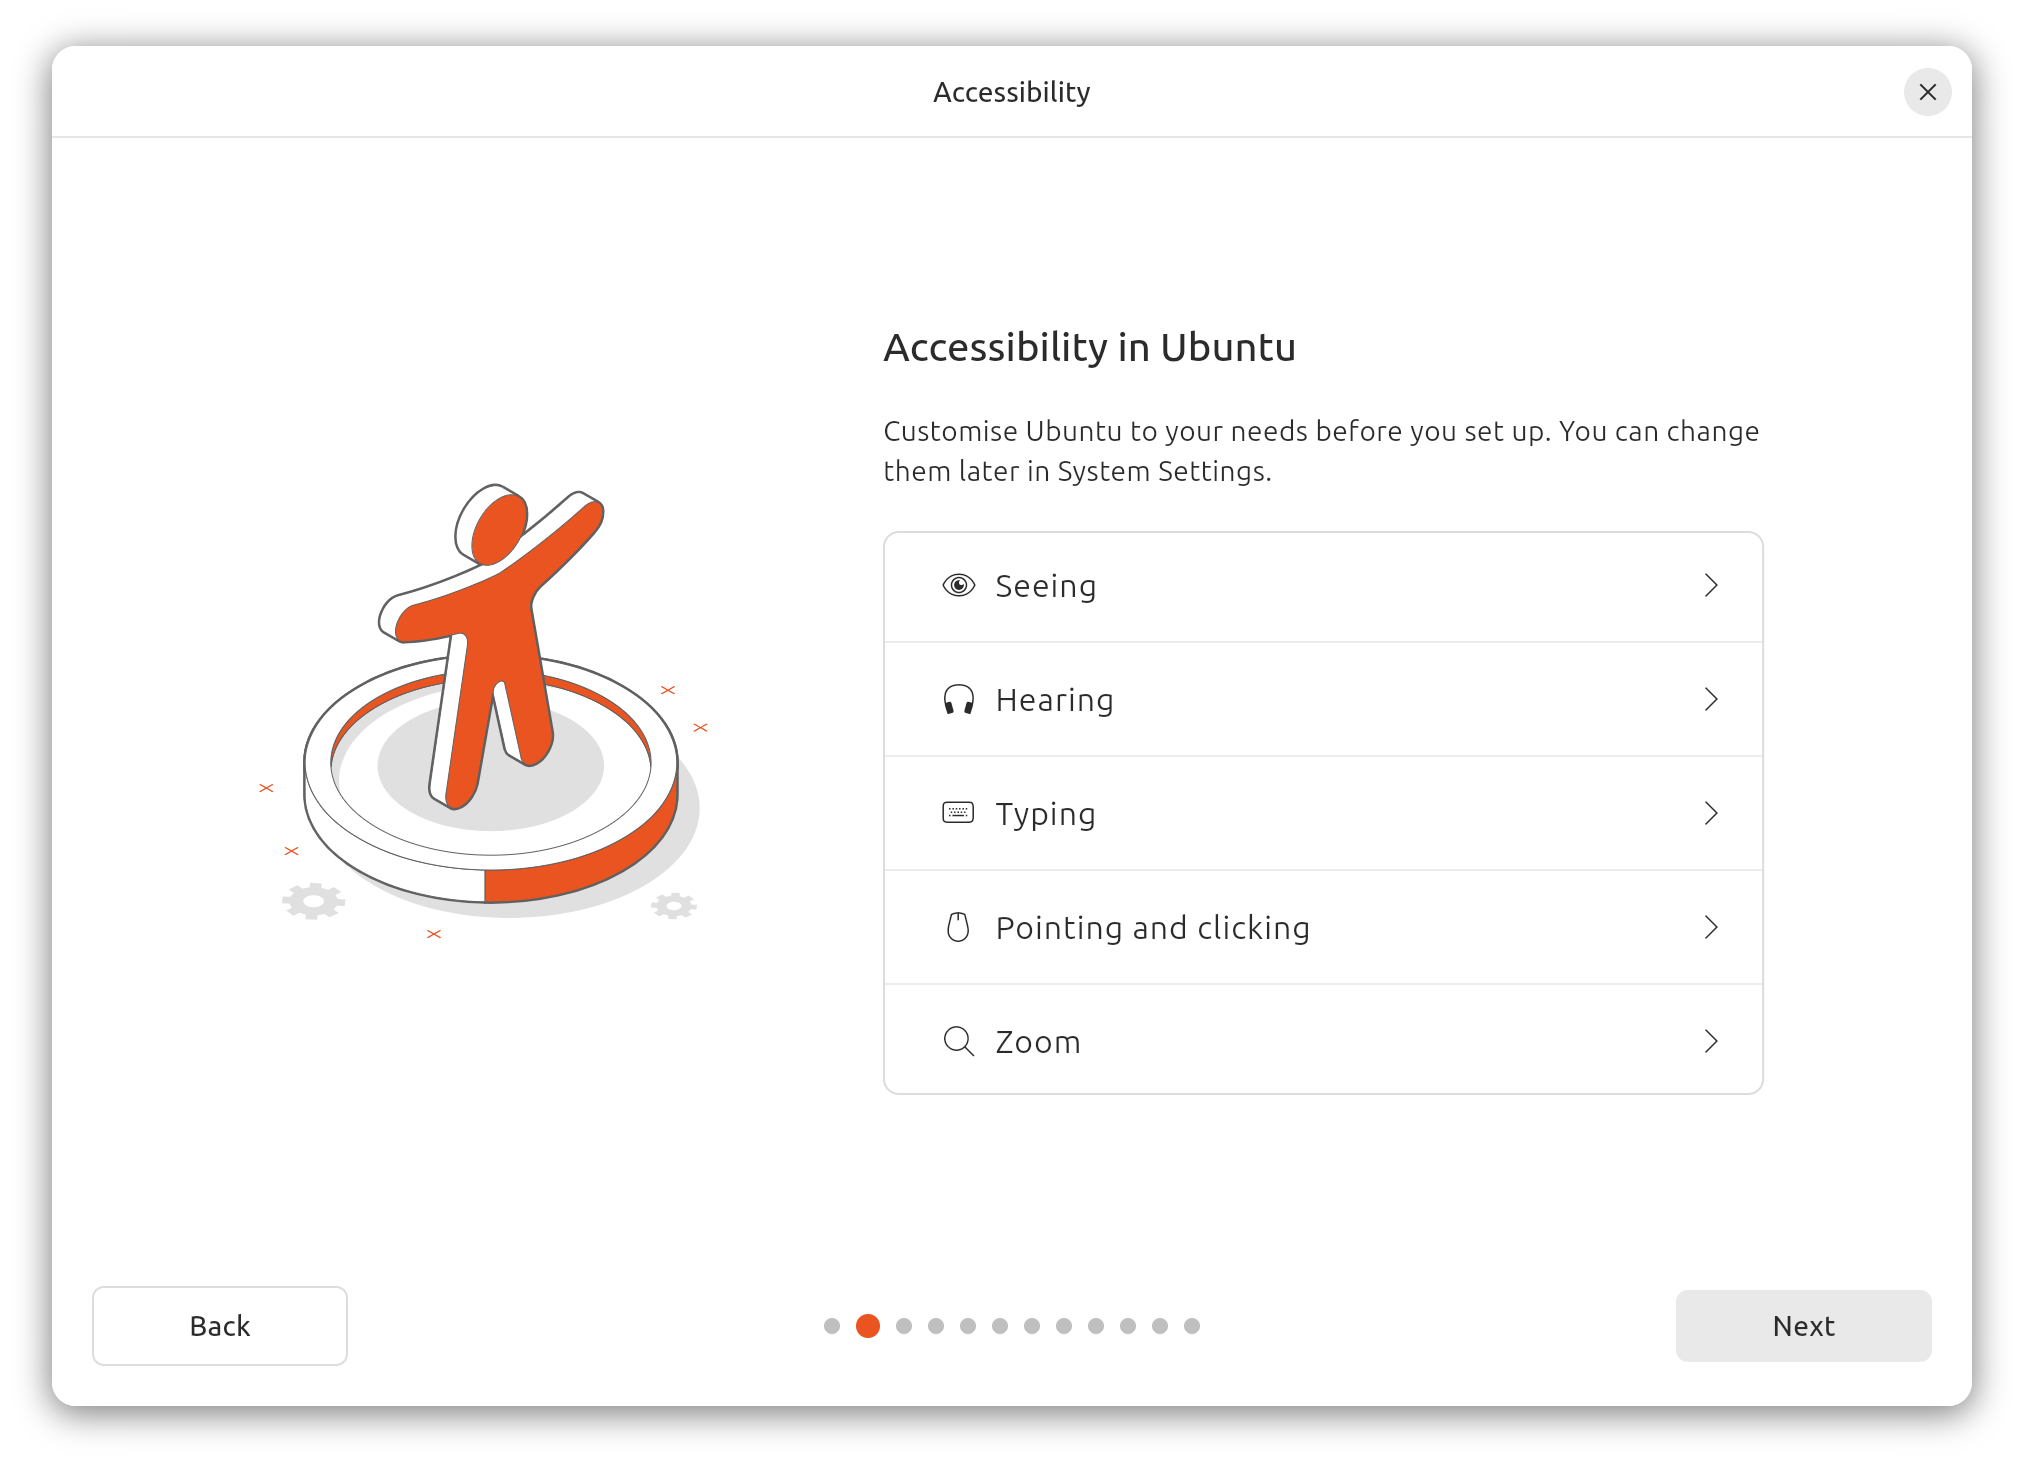
- Choose your desired accessibility options for Ubuntu
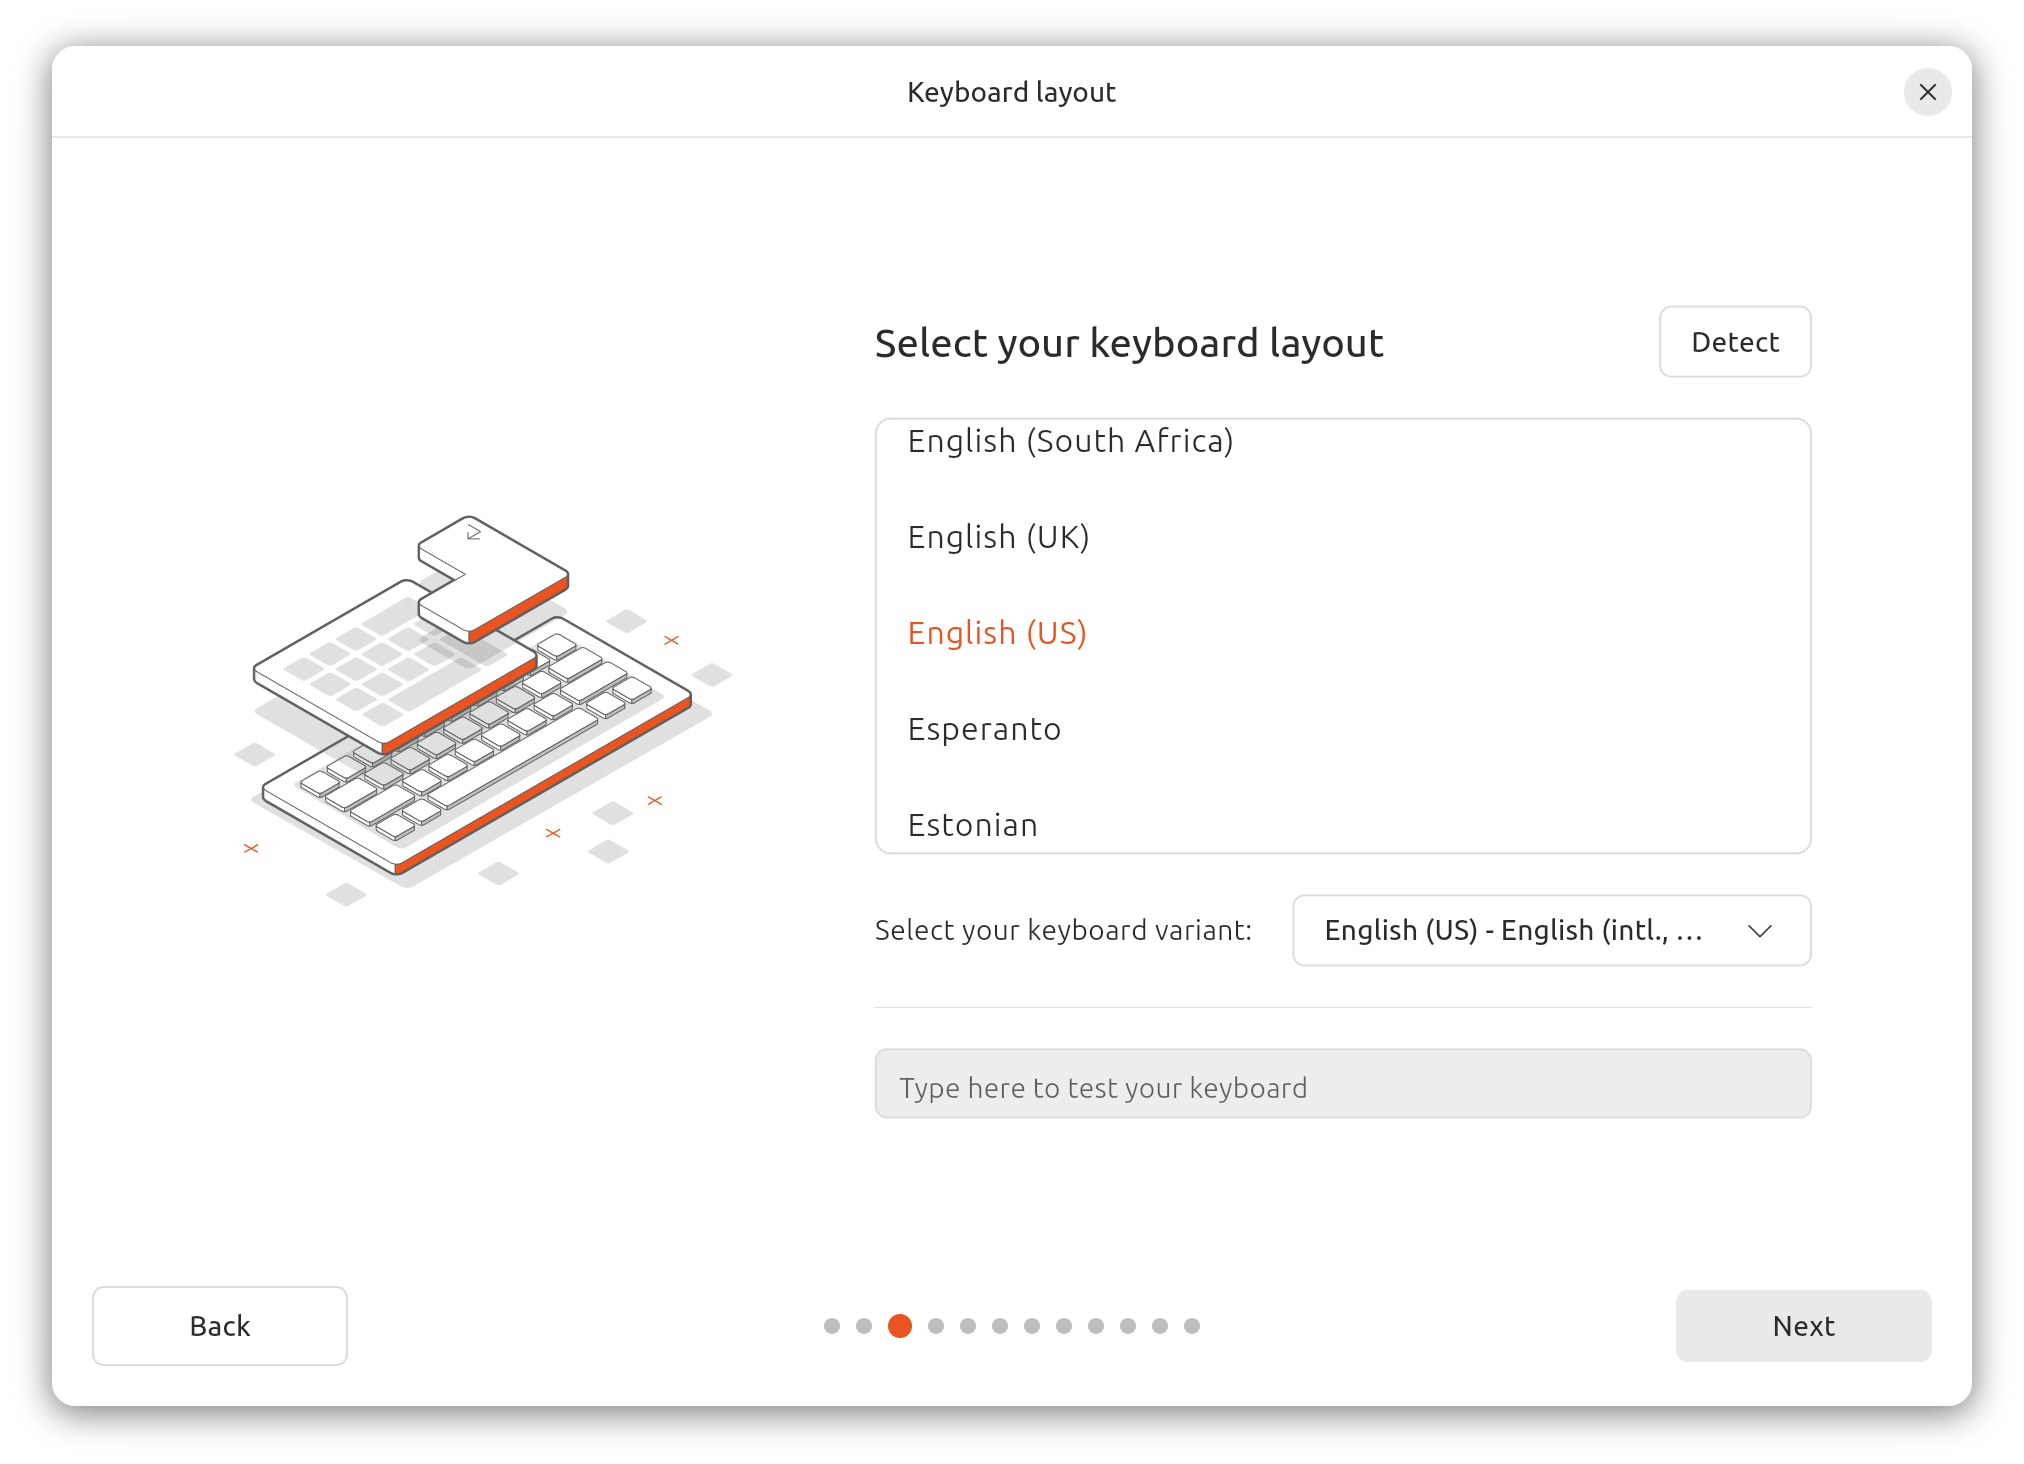
- Select your keyboard layout
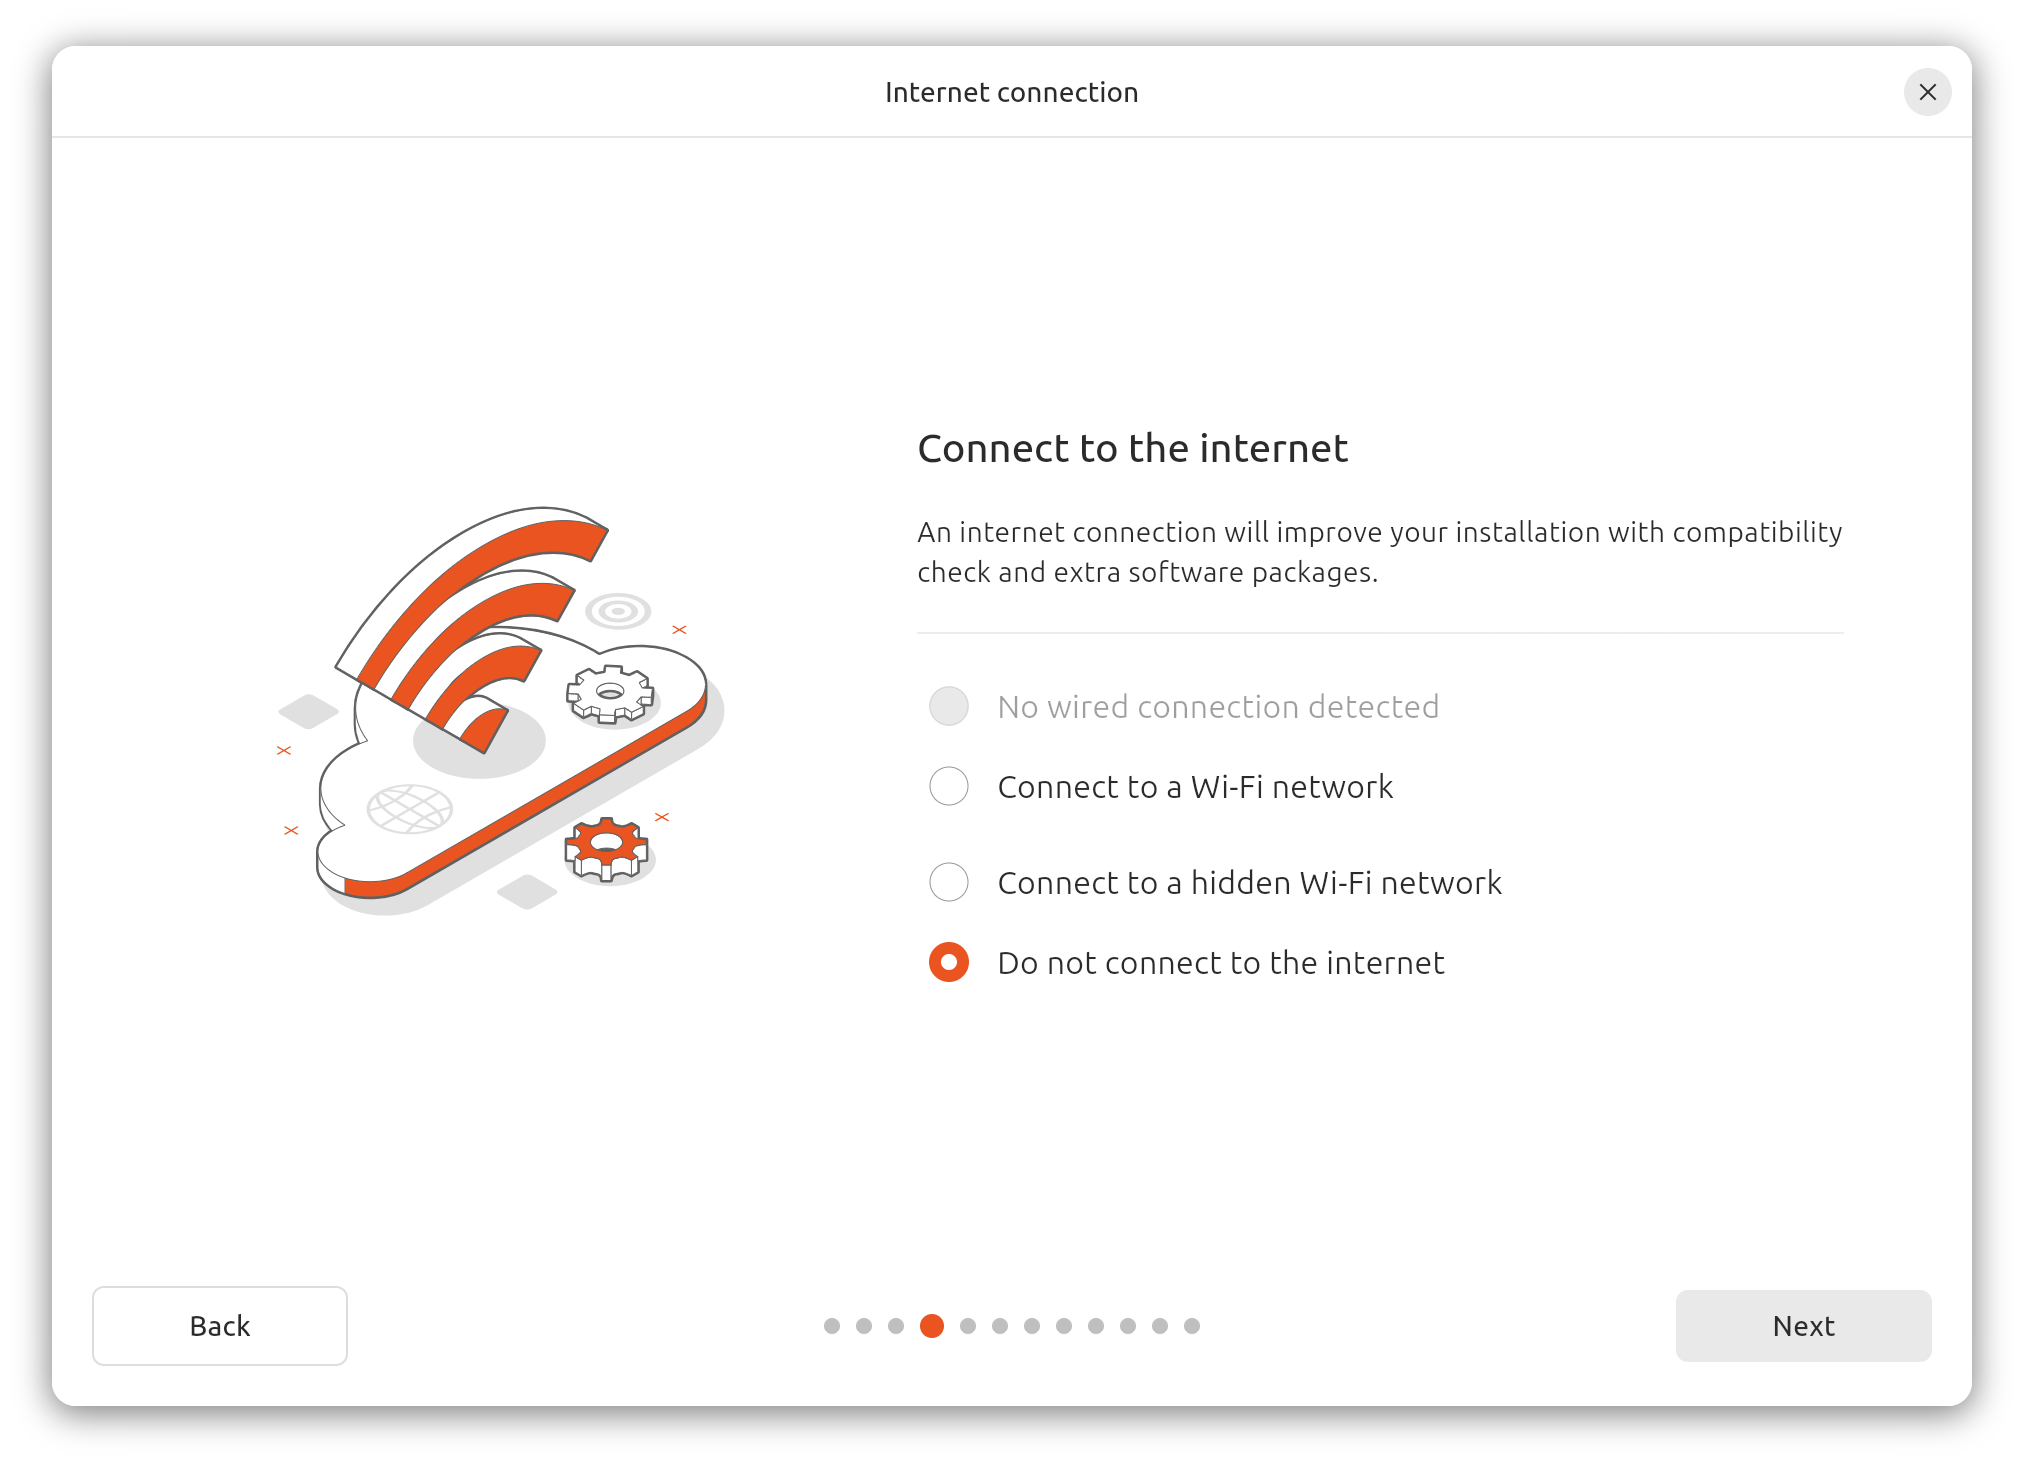
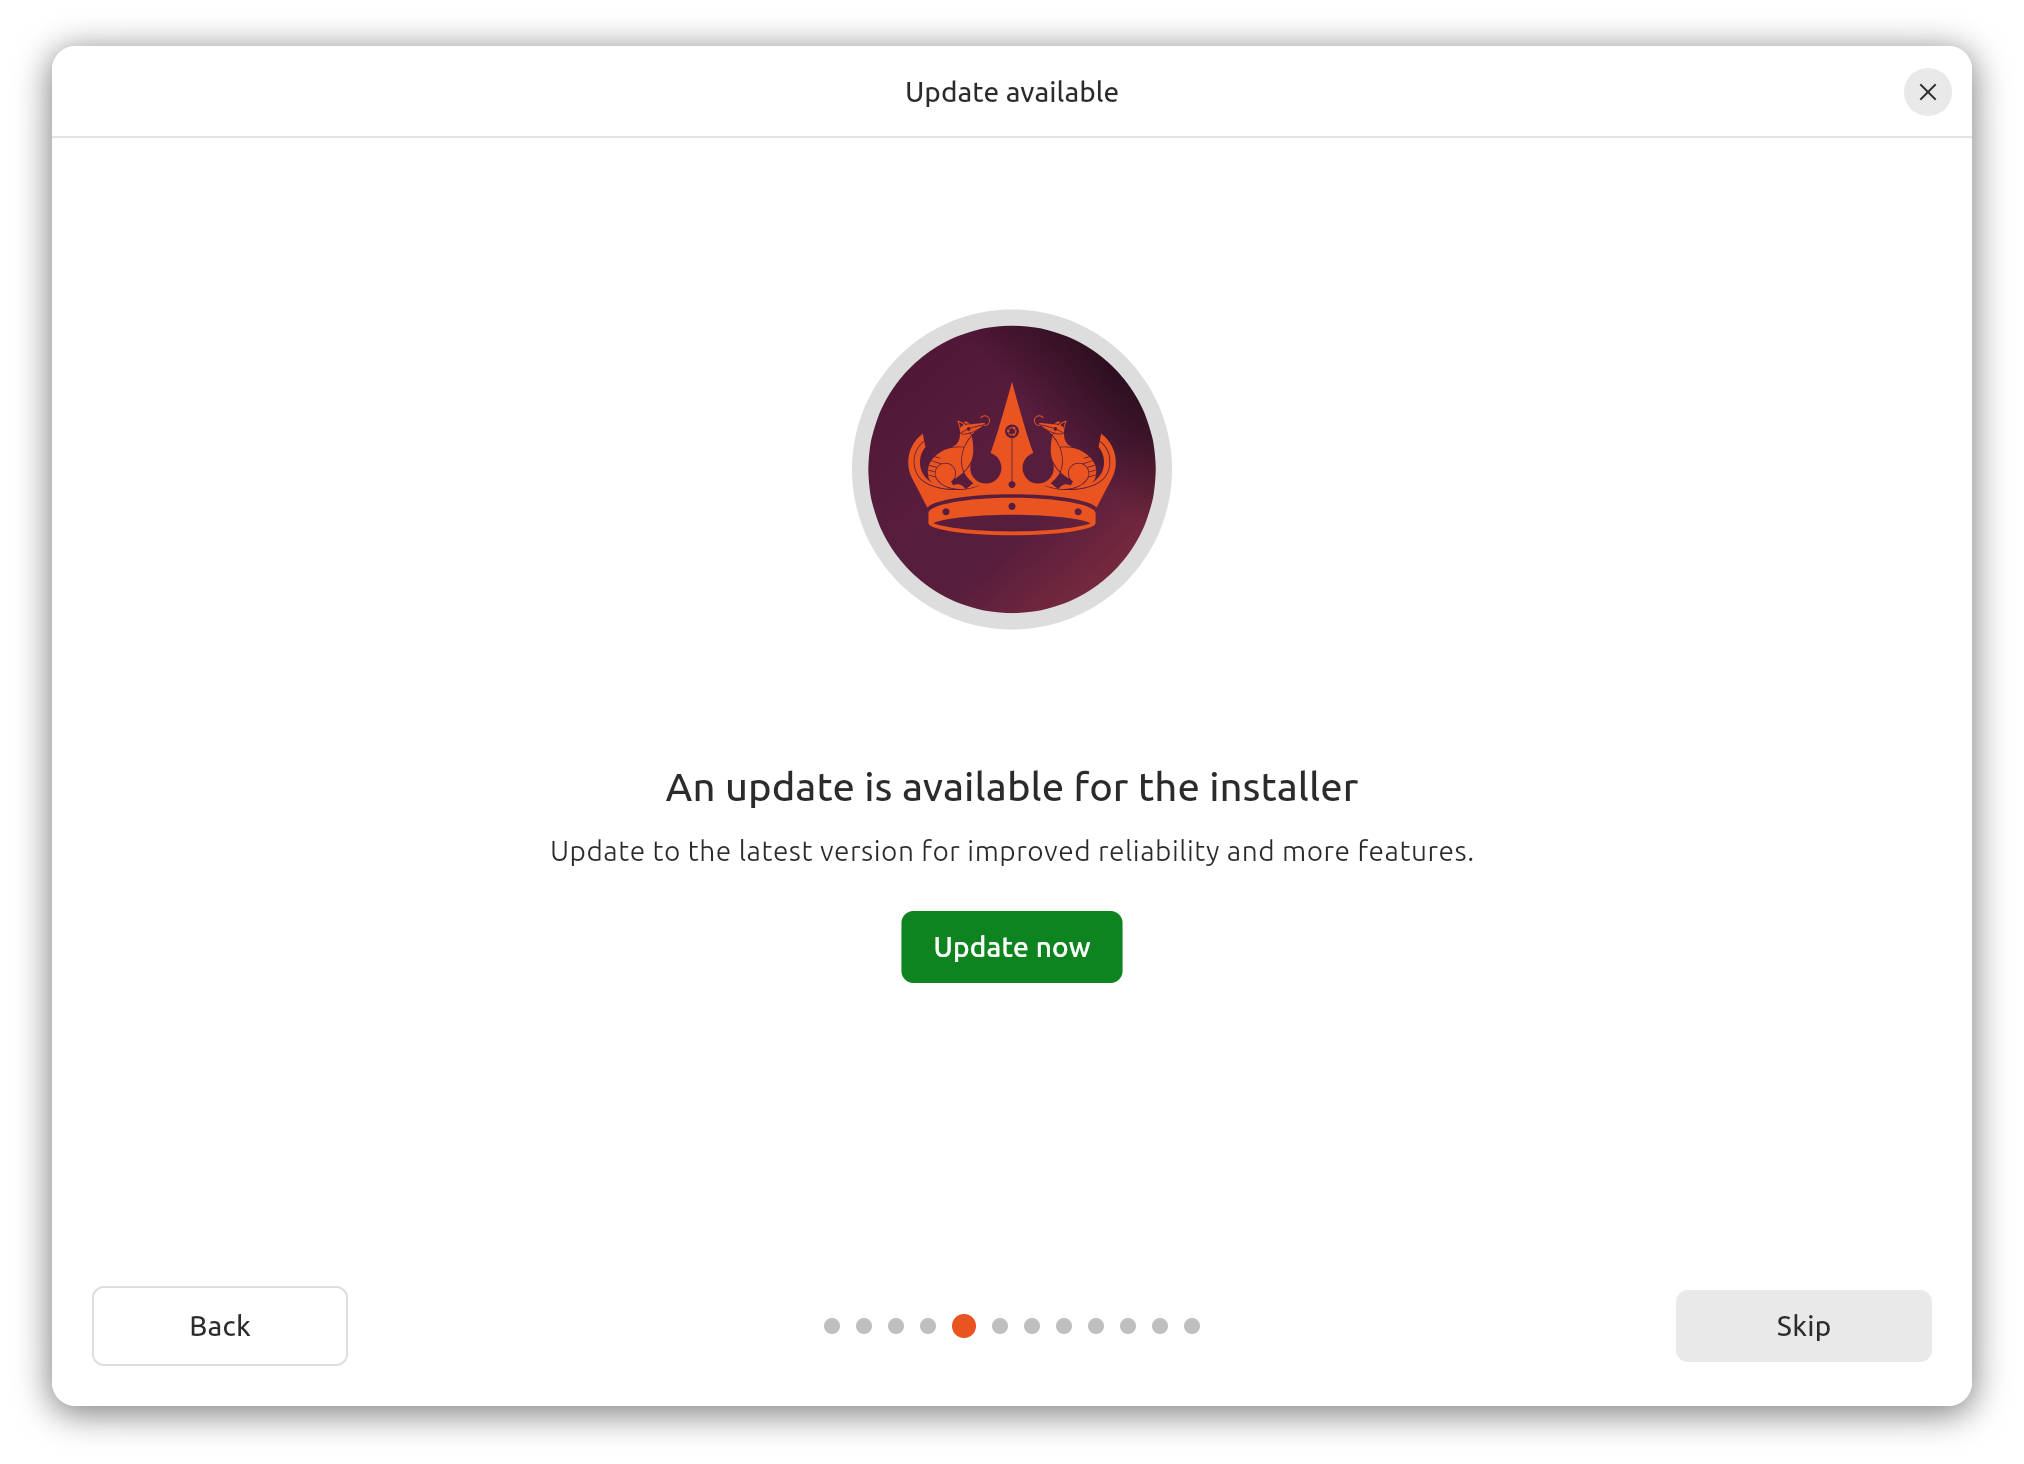
- (optional) Setup the Internet connection to update the installer
- (optional) Update the OS installer if needed, and return to step 6
- Select Interactive installation for the OS installation type
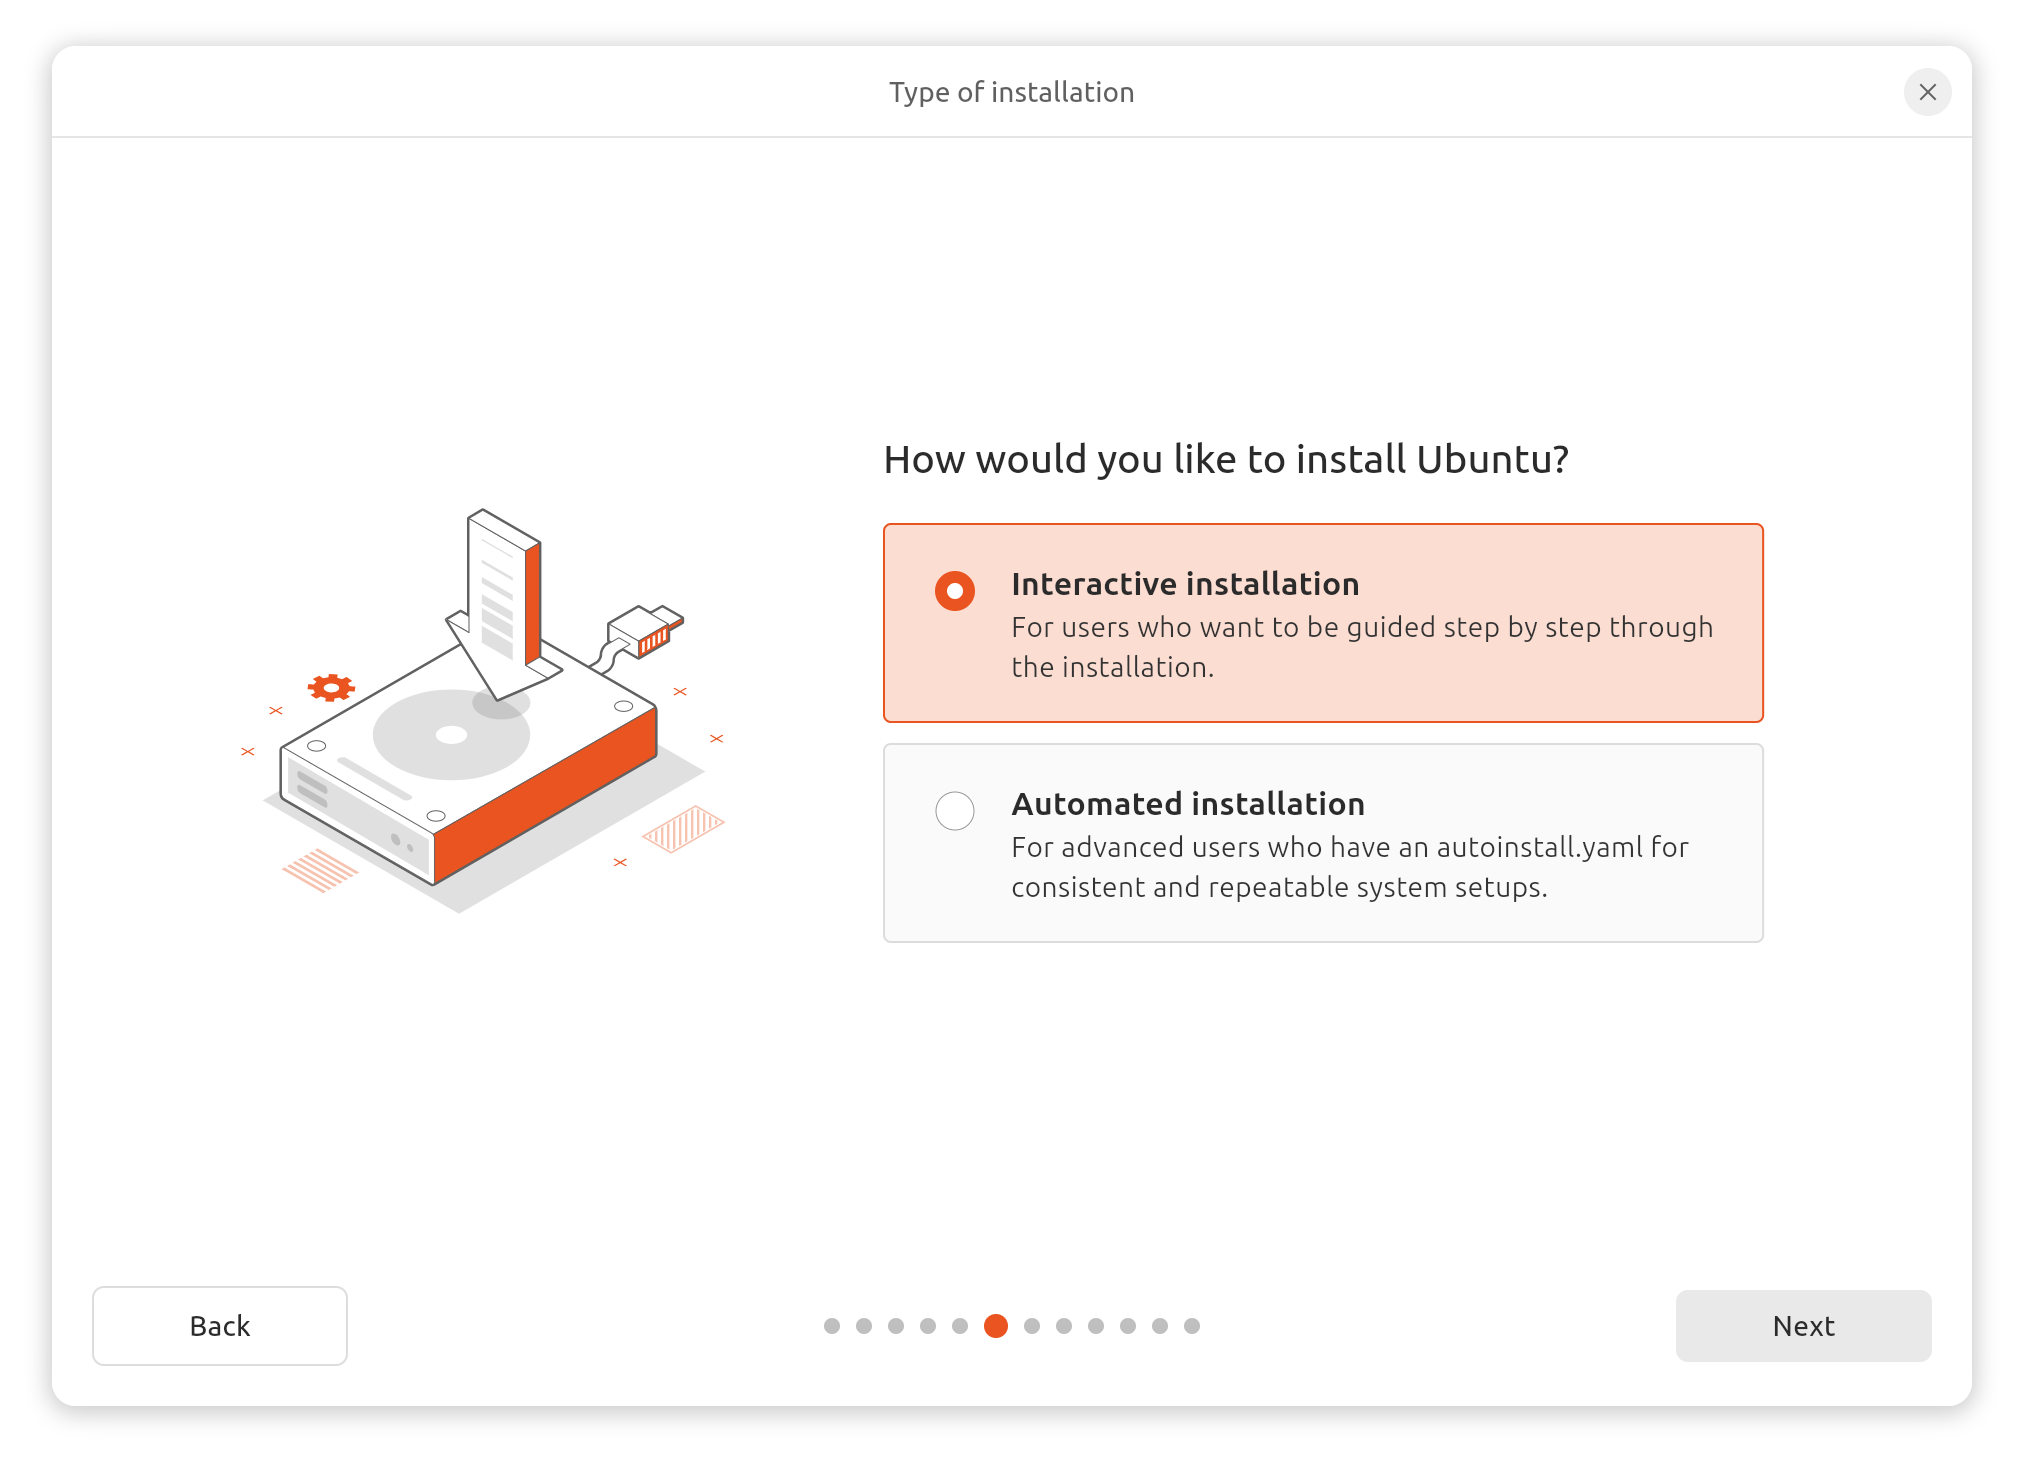
- Automated installation uses an YAML file for automatic Ubuntu installation (see https://canonical-subiquity.readthedocs-hosted.com/en/latest/reference/autoinstall-reference.html)
- Use Default selection to just install the essentials, web browser, and
basic utilities
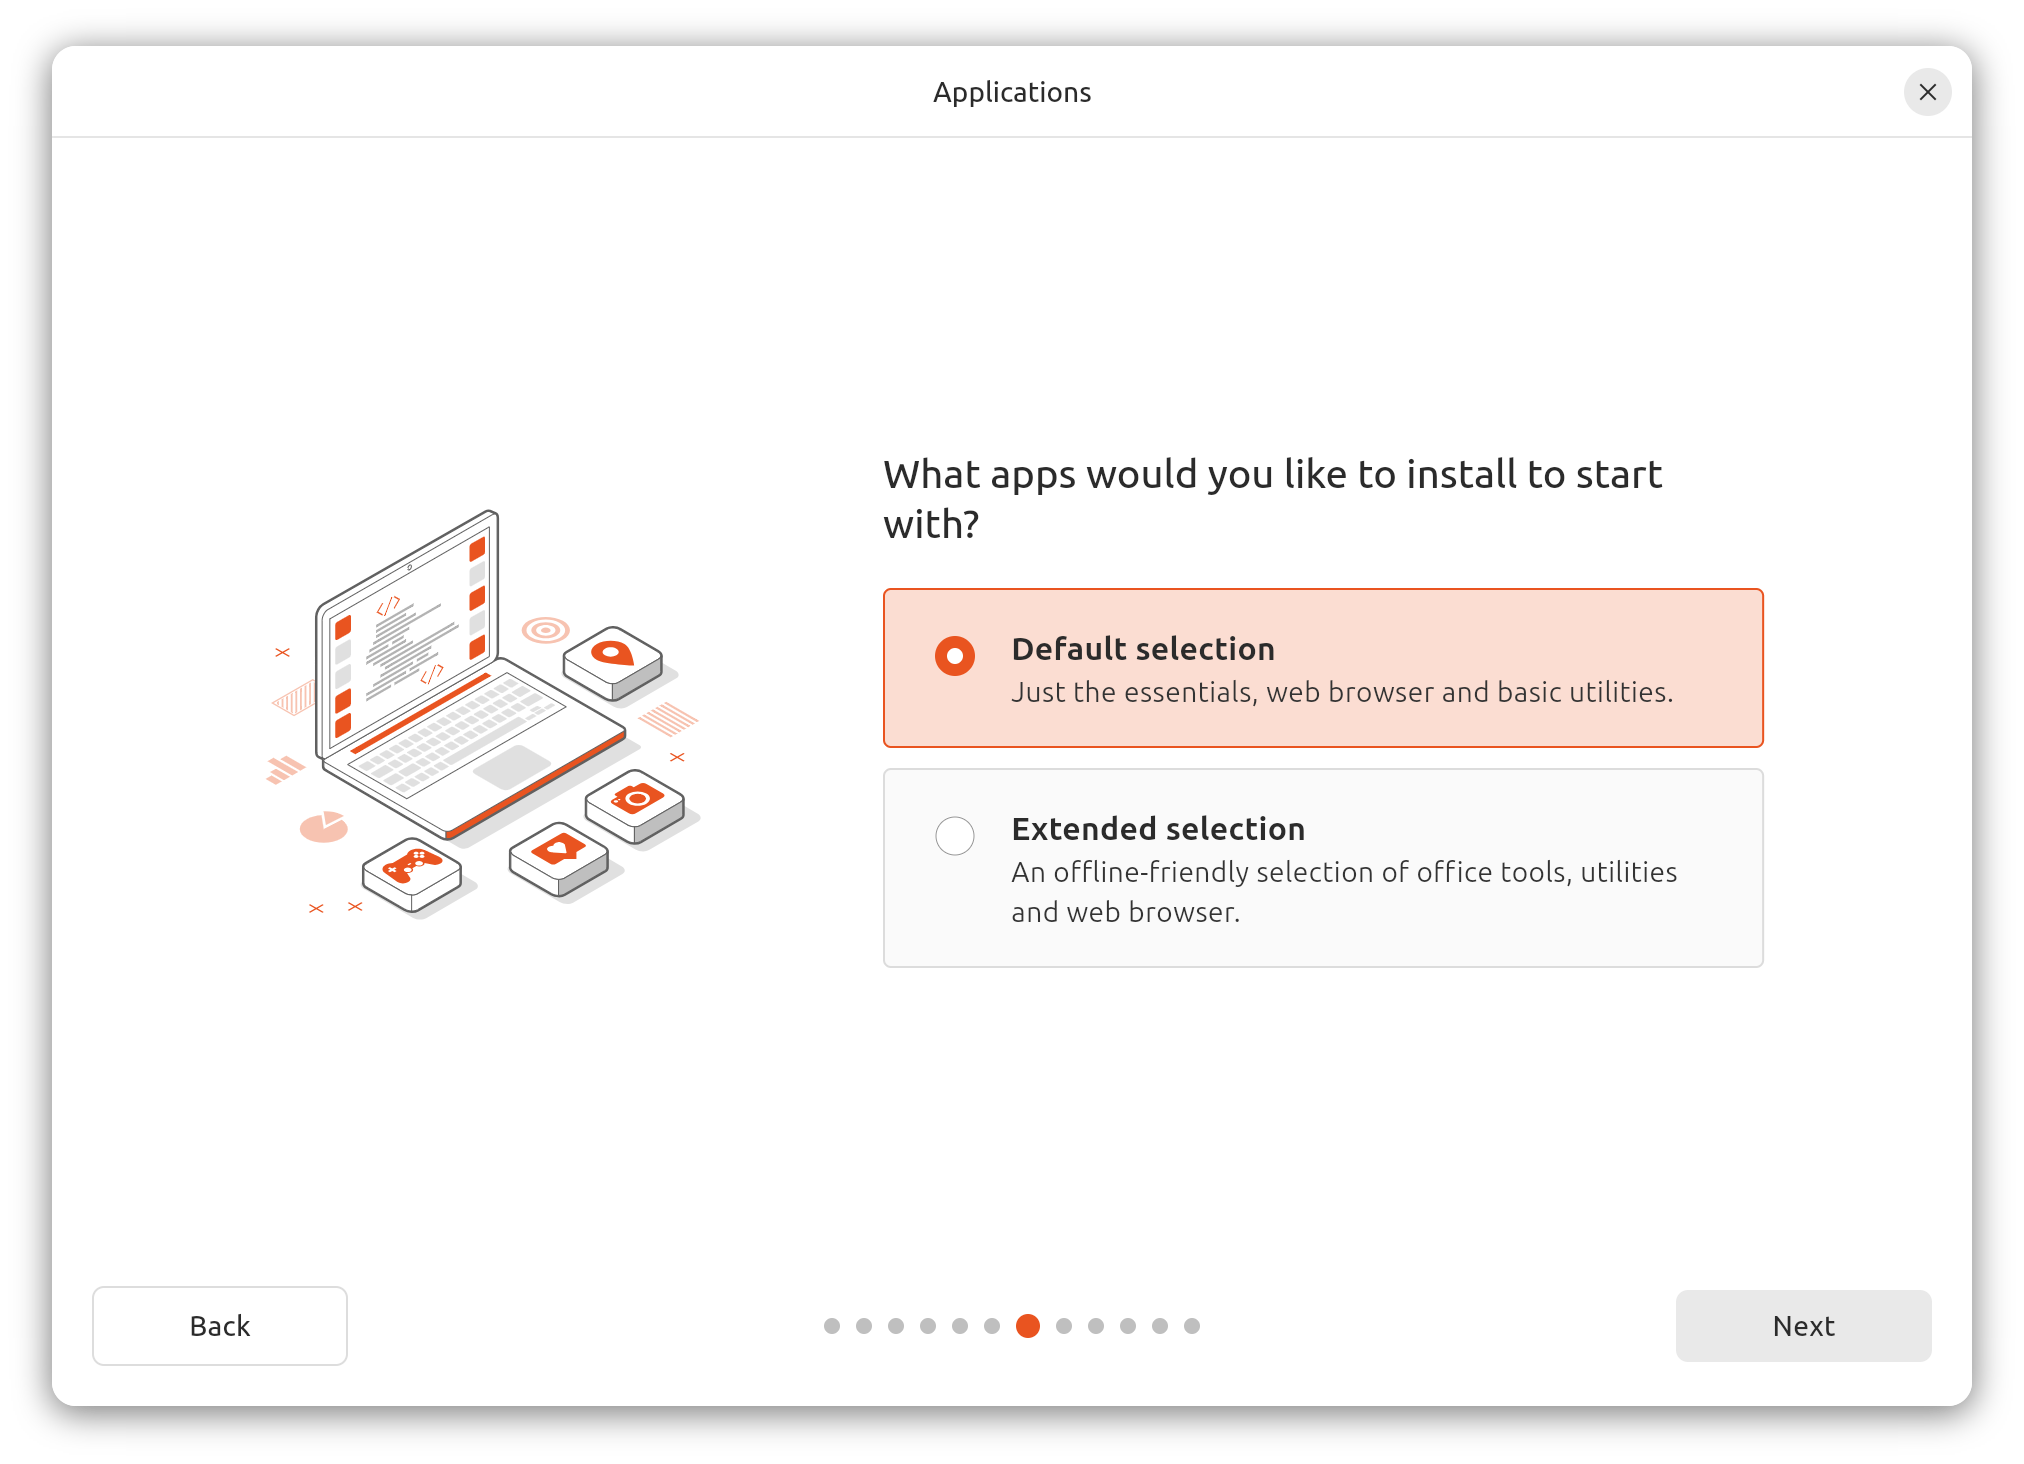
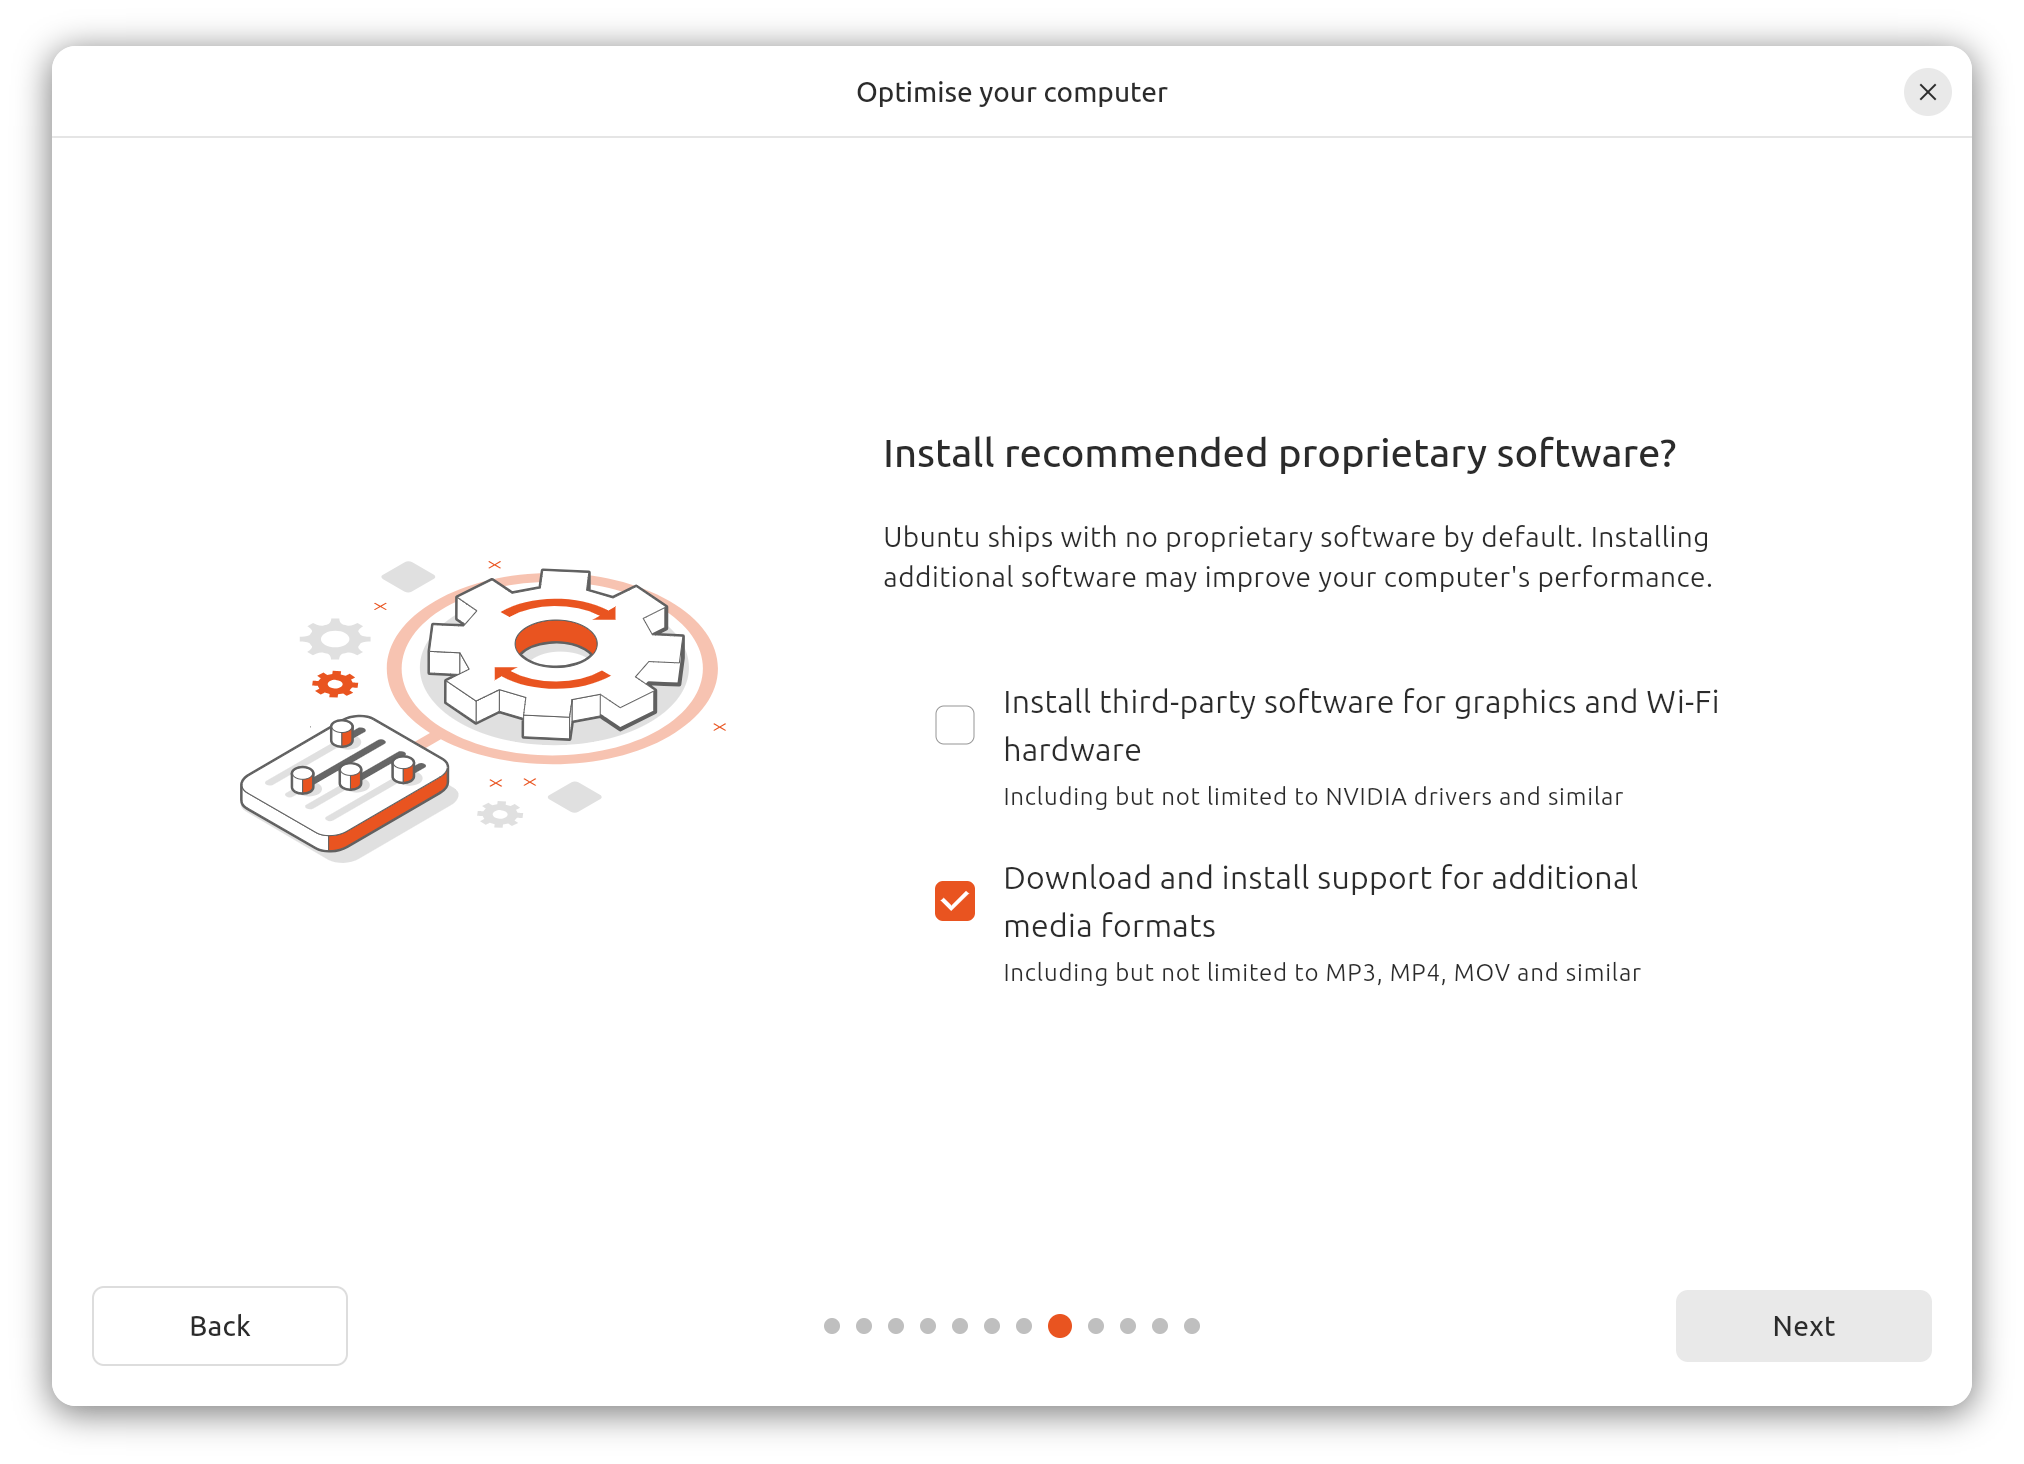
- Enable Download and install support for additional media formats to
install media codecs in your OS
-
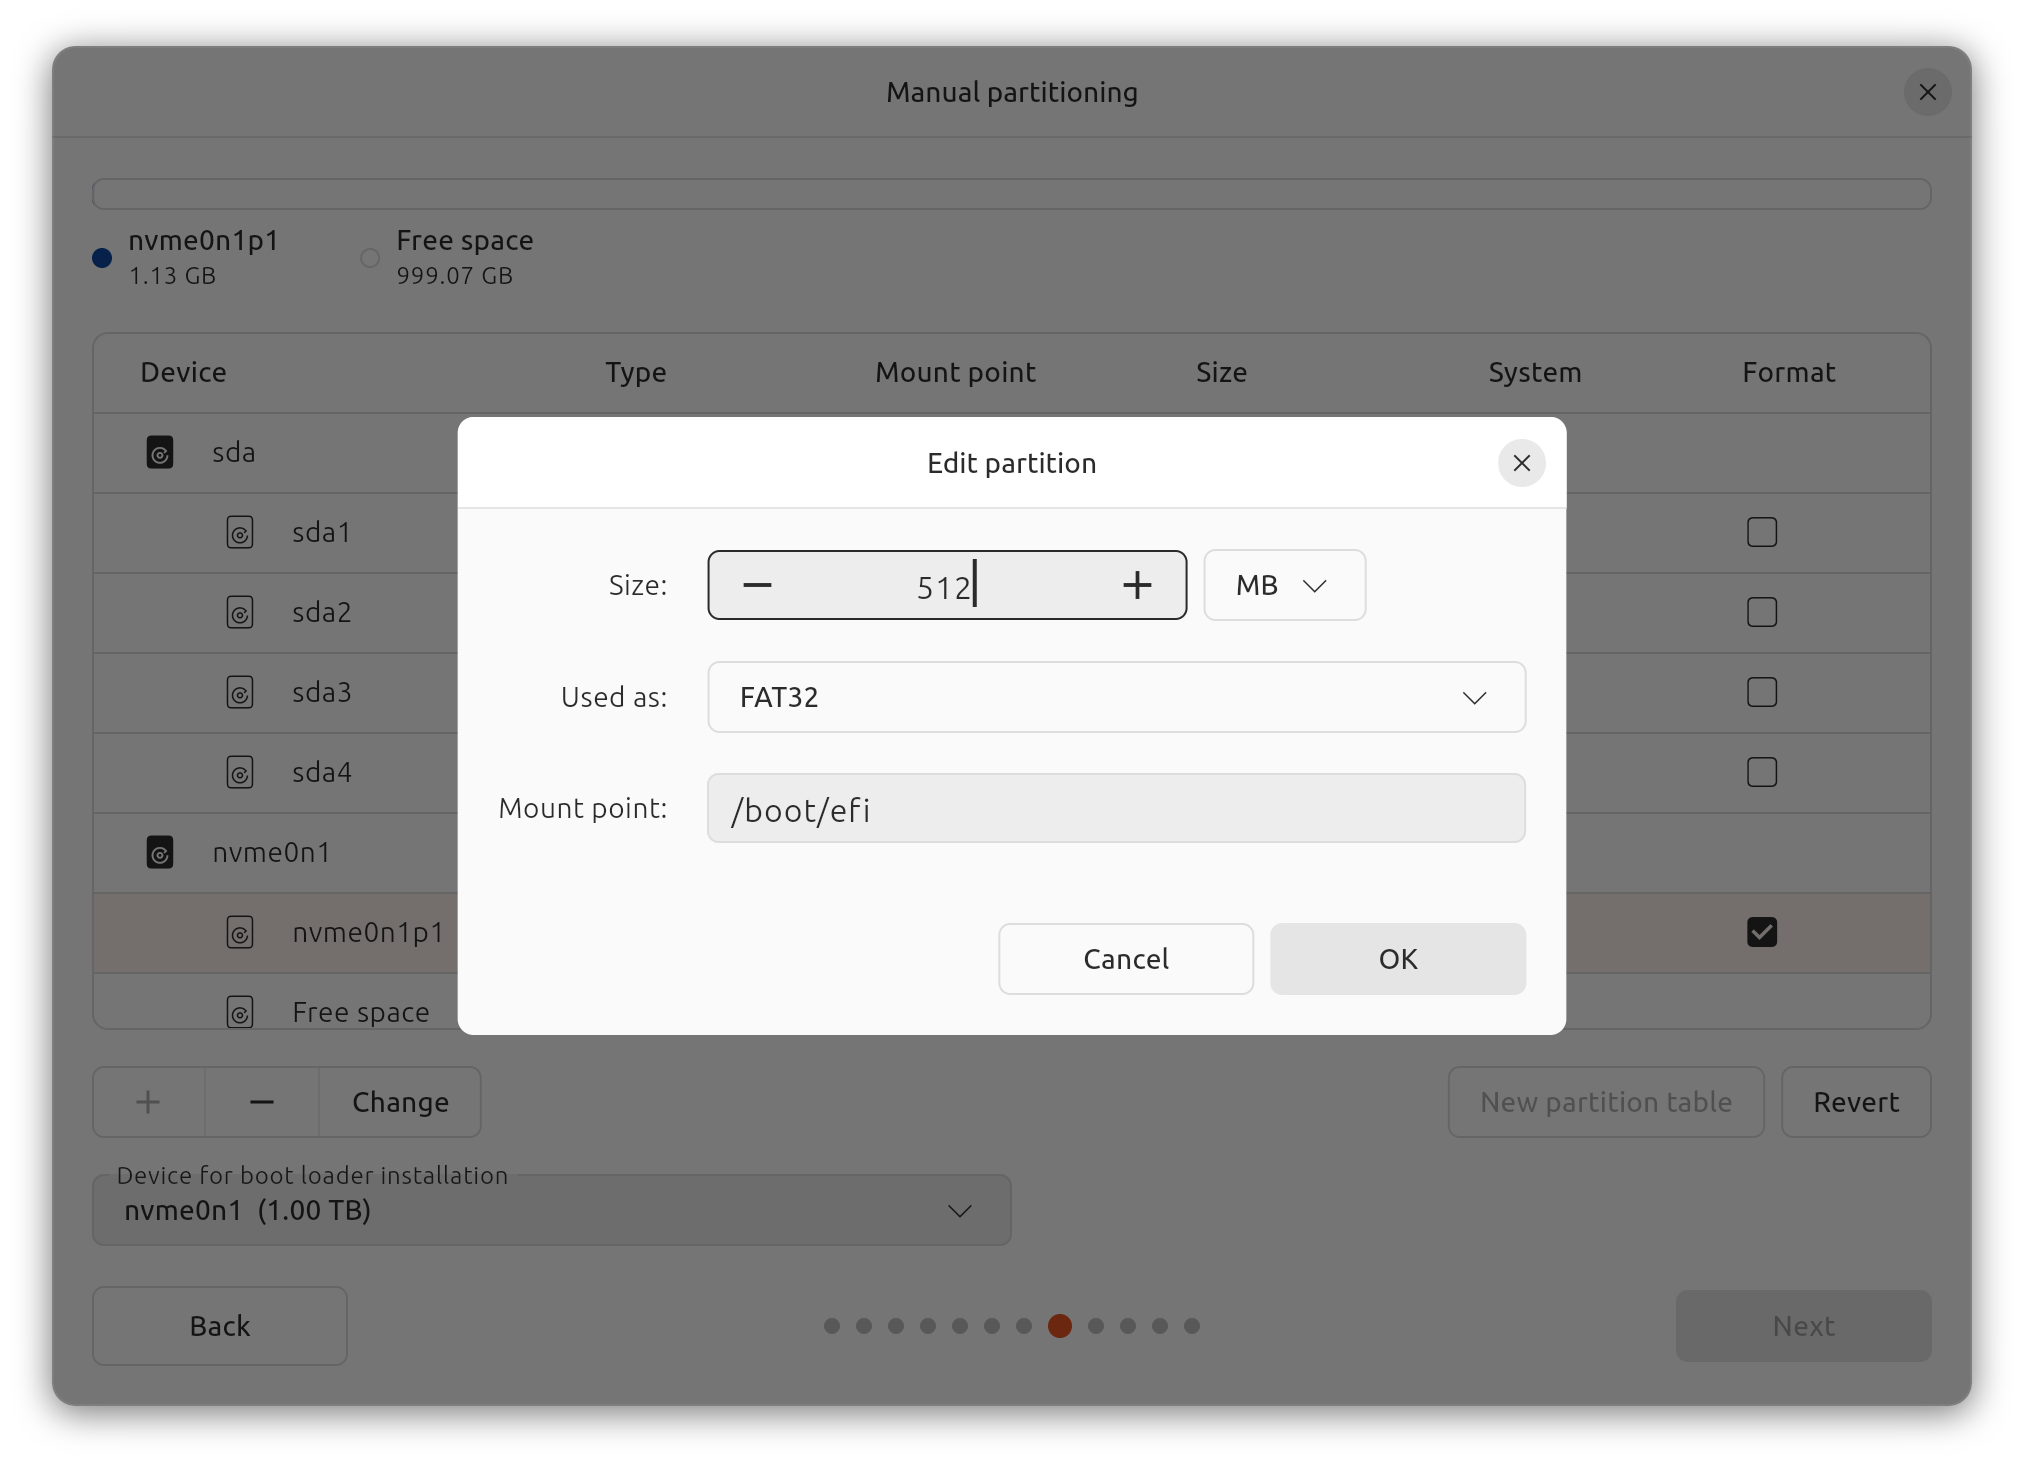
Select Manual installation to create and resize partitions yourself
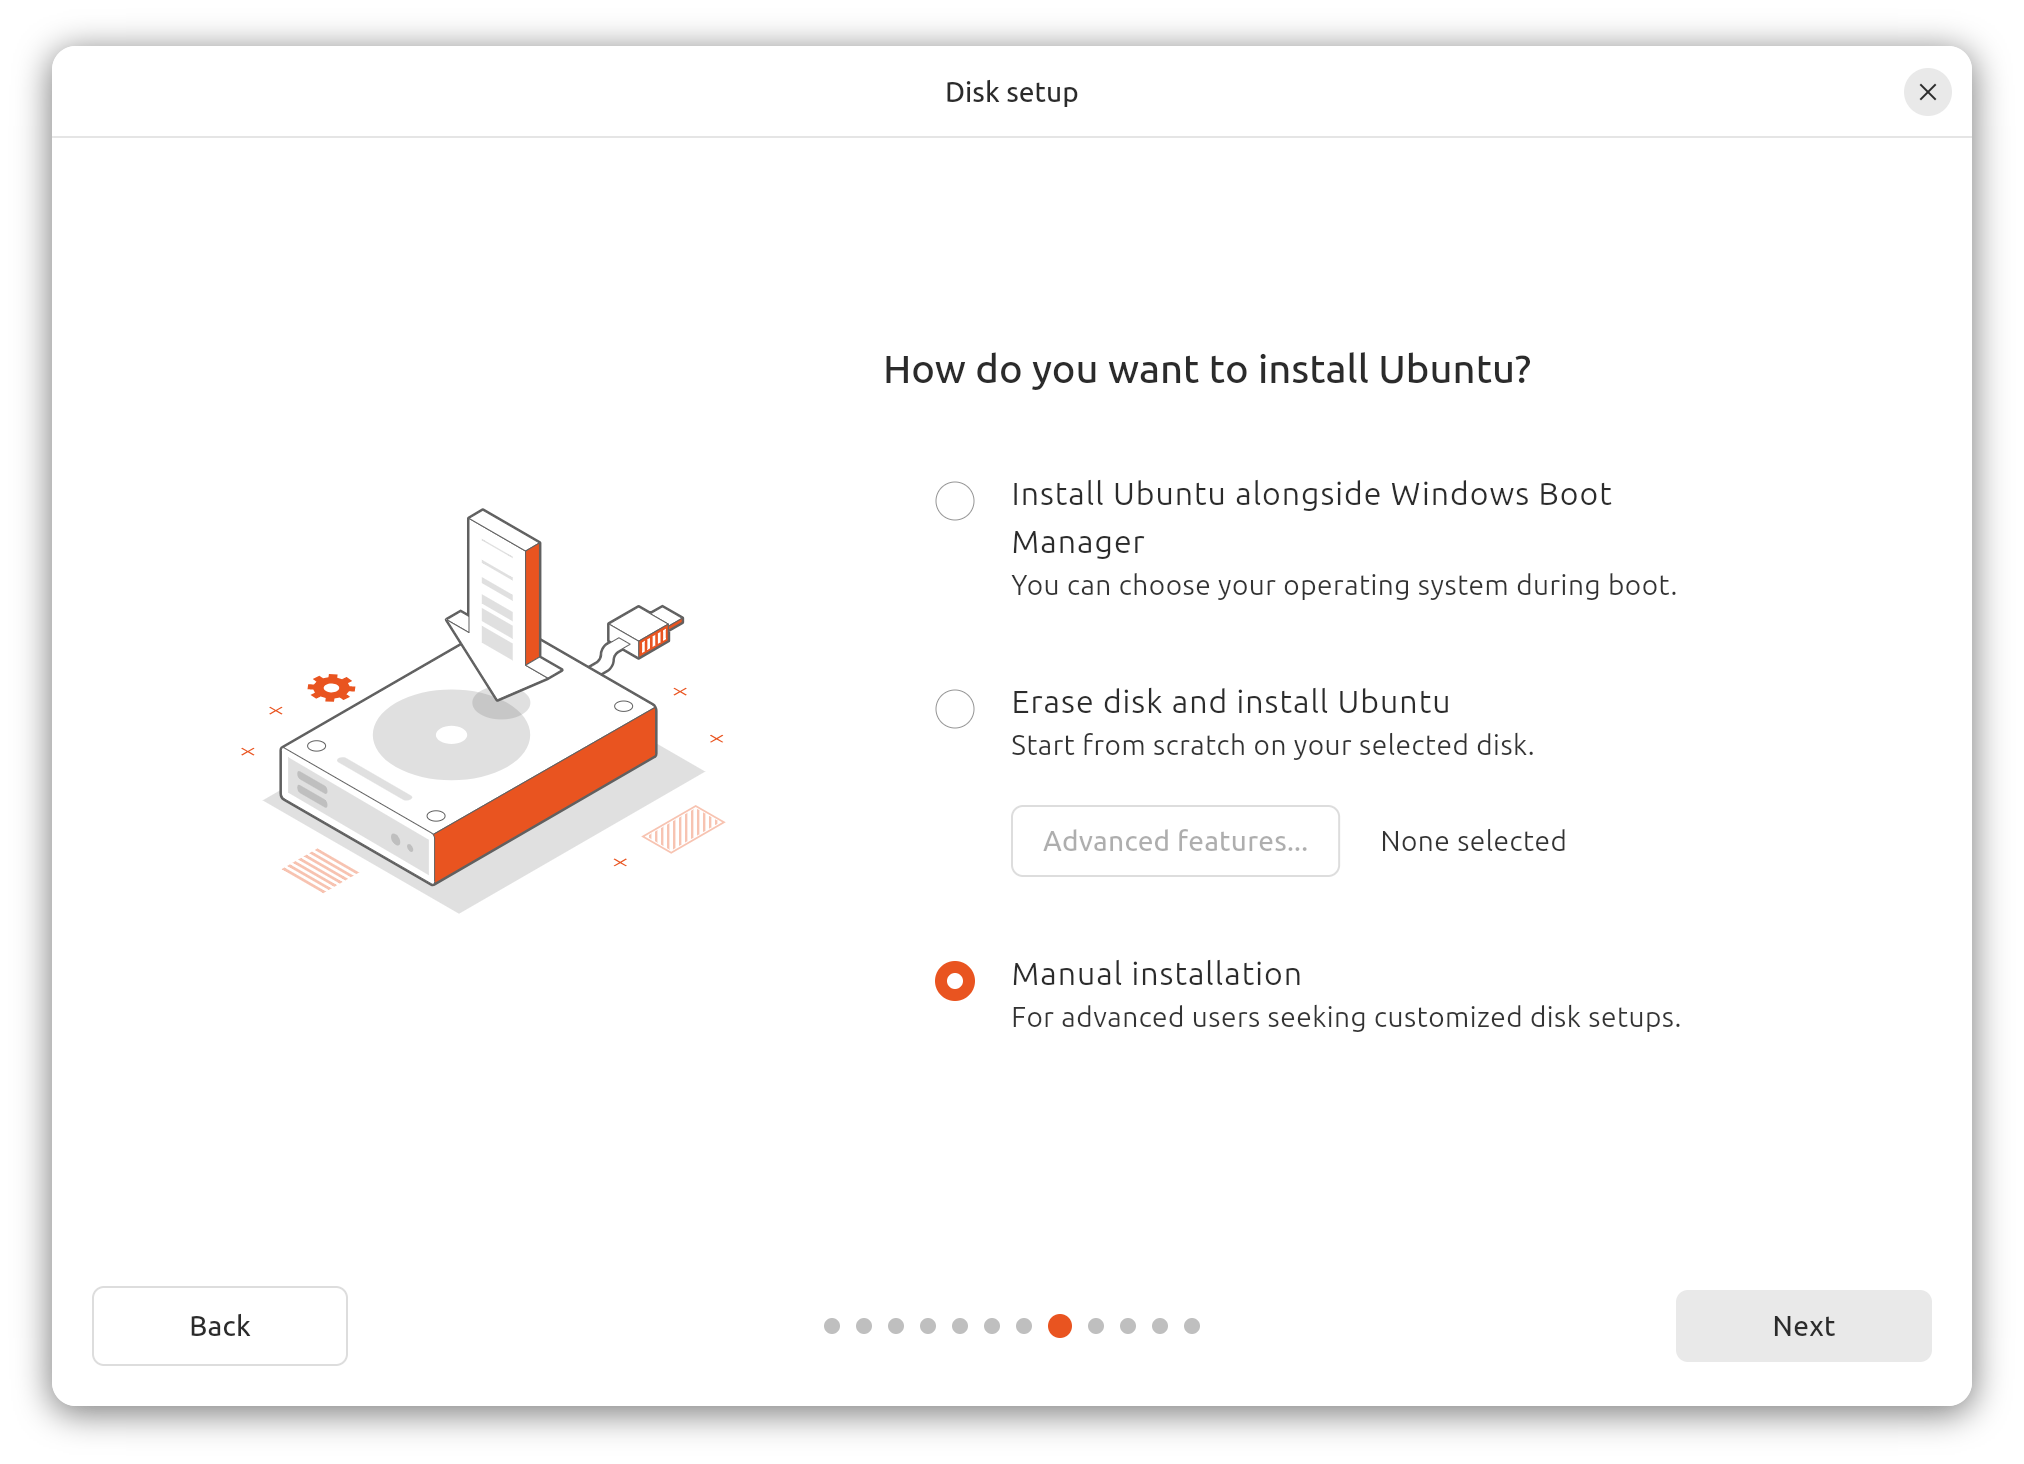
- Remove all pre-existing partitions in the disk device used for the OS
installation (
nvme0n1)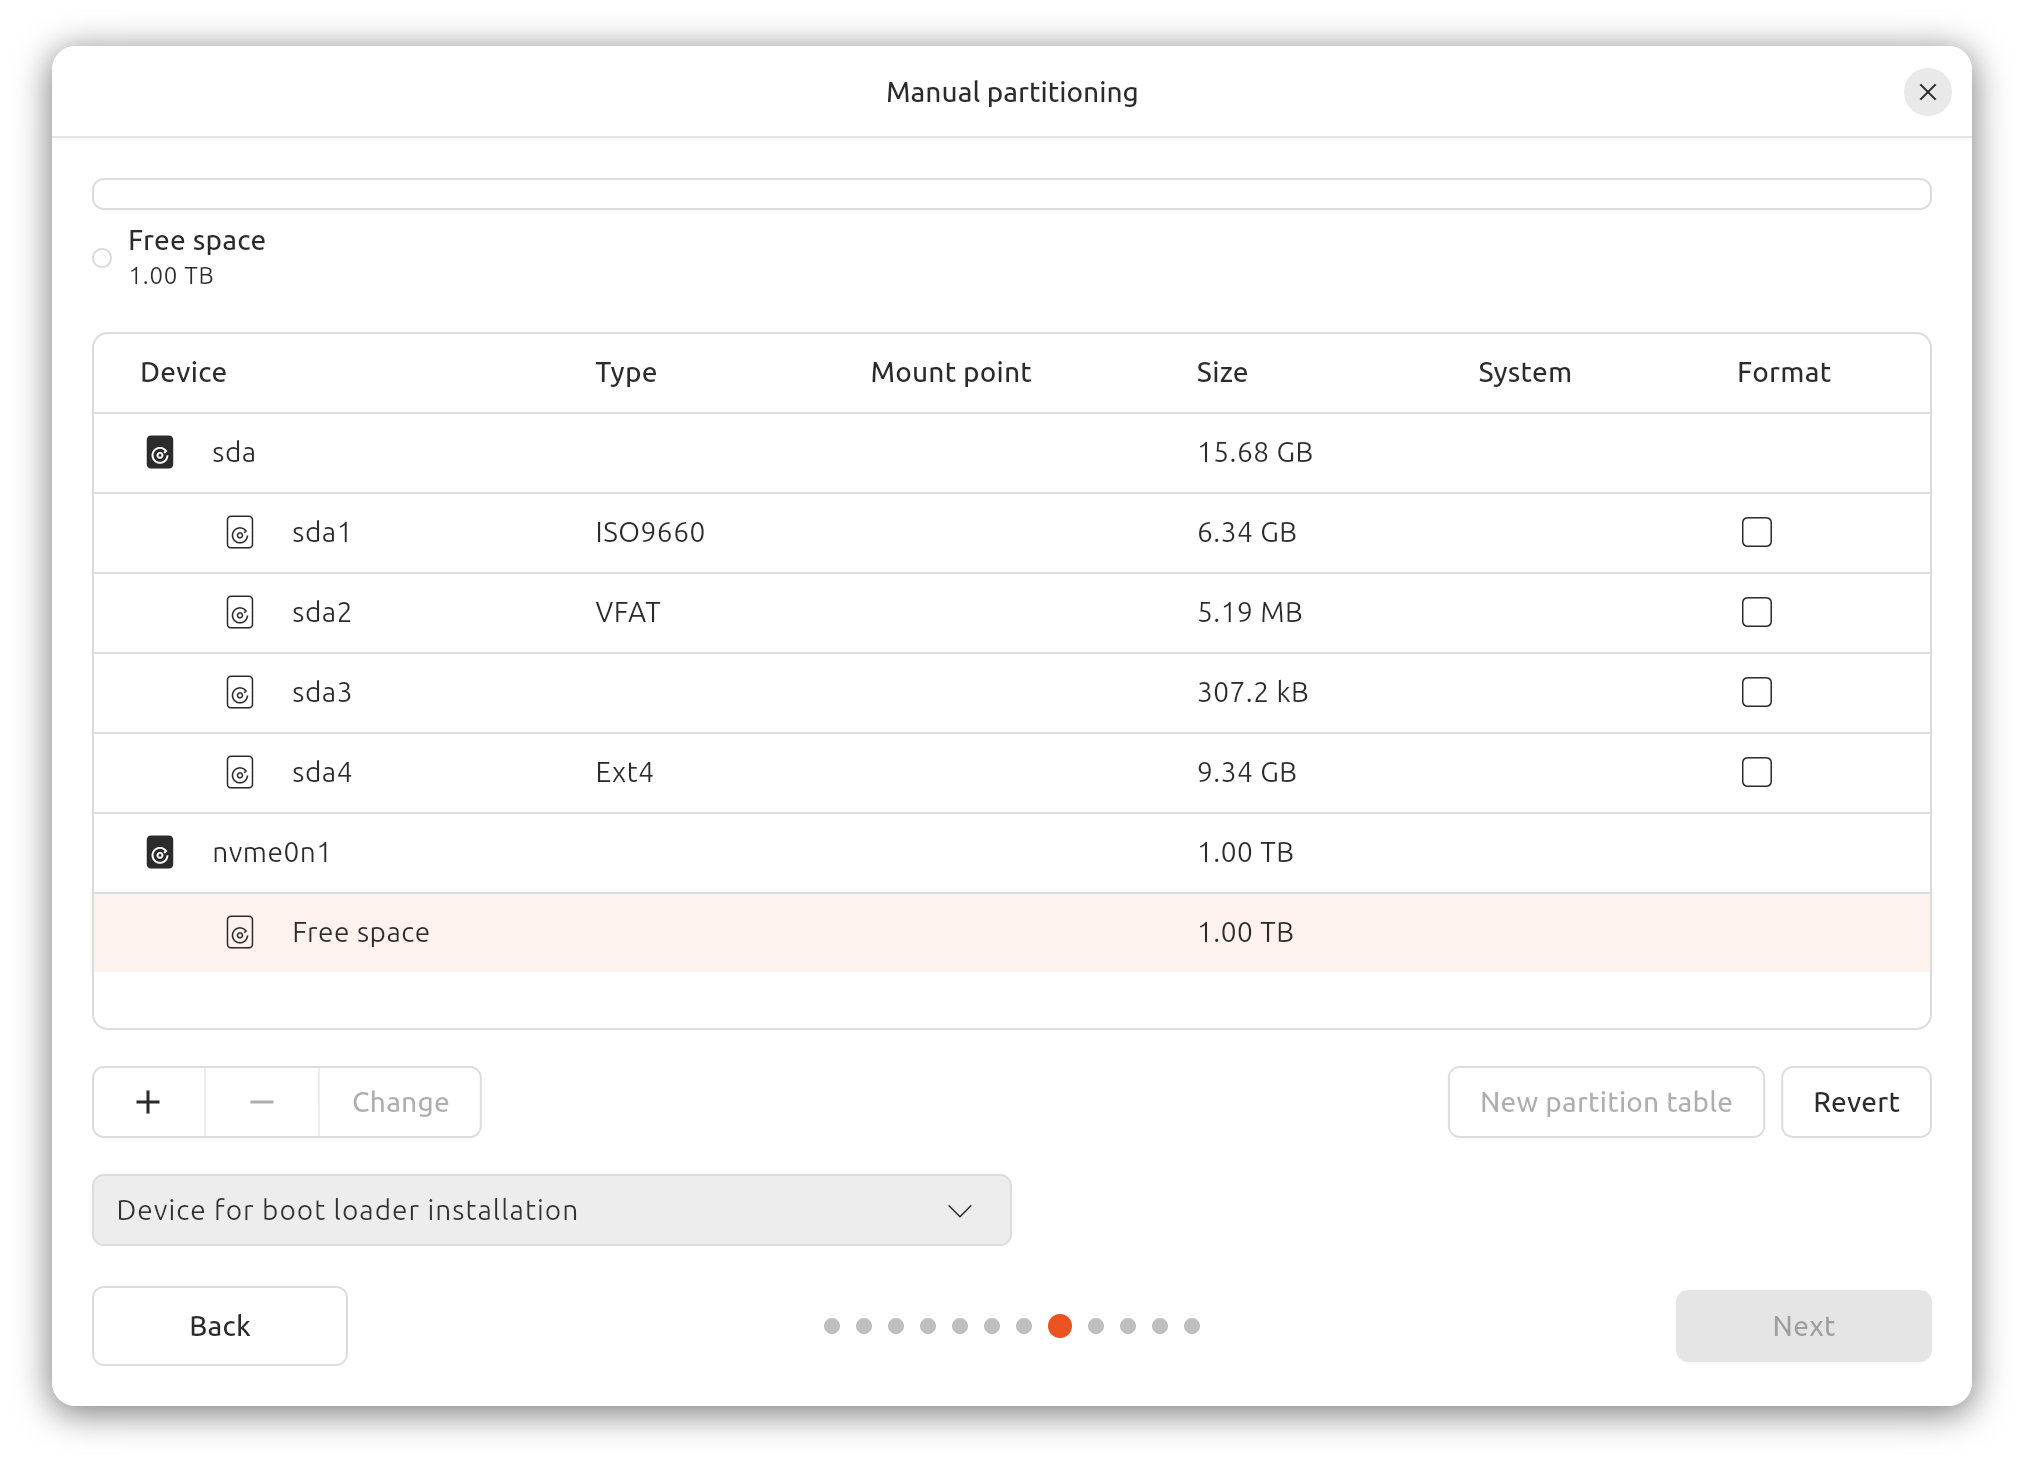
- Select the
nvme0n1disk device for boot loader installation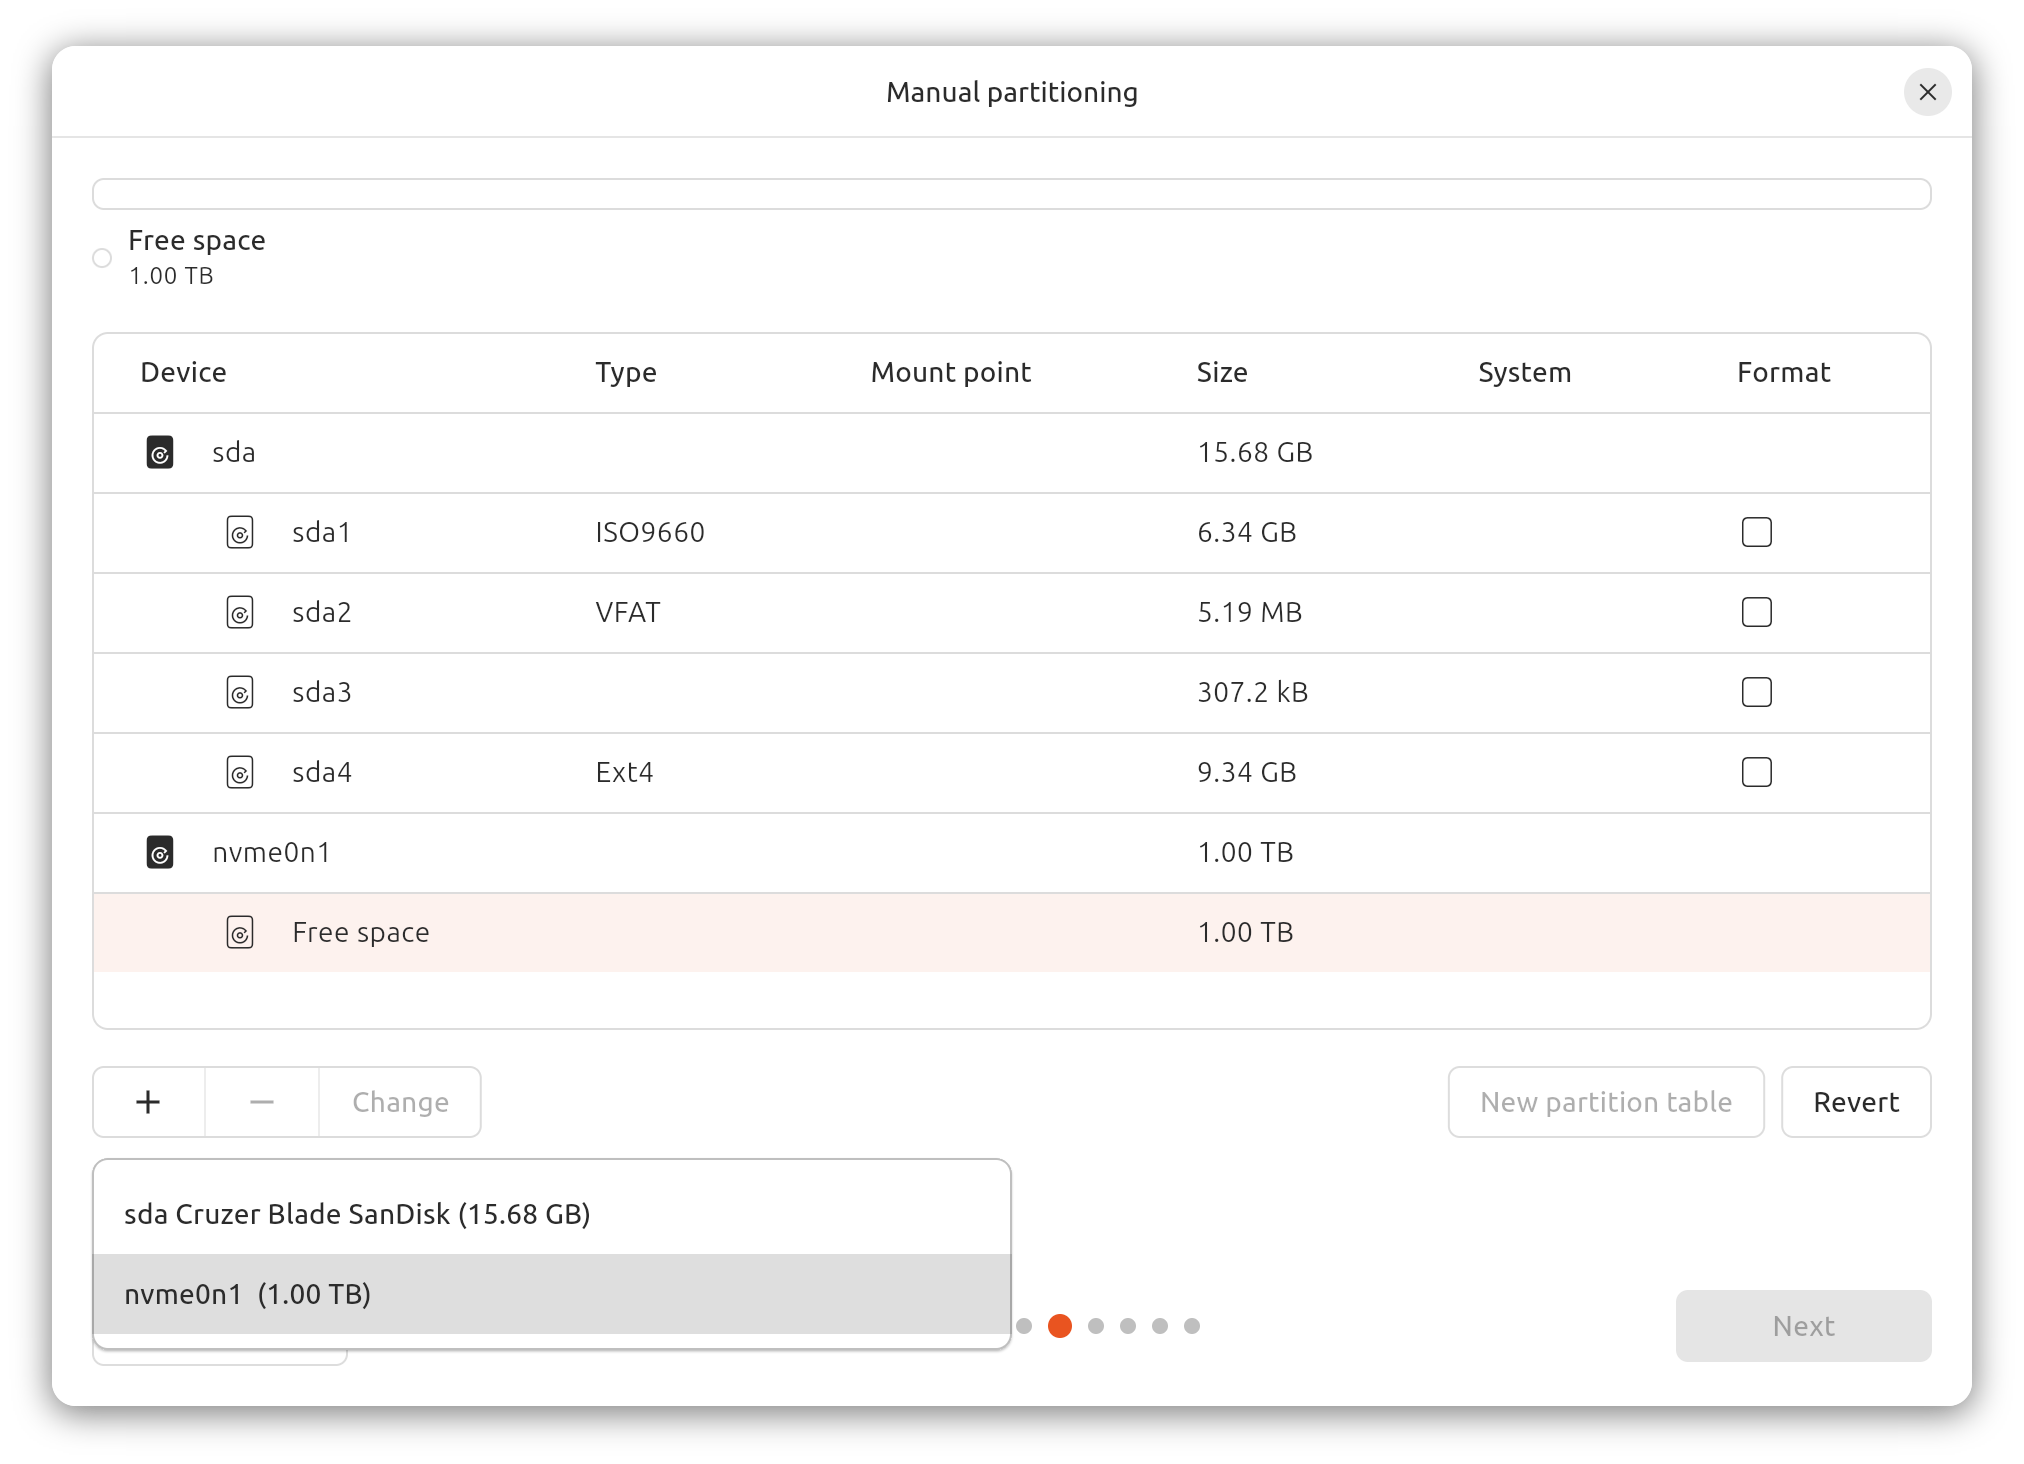
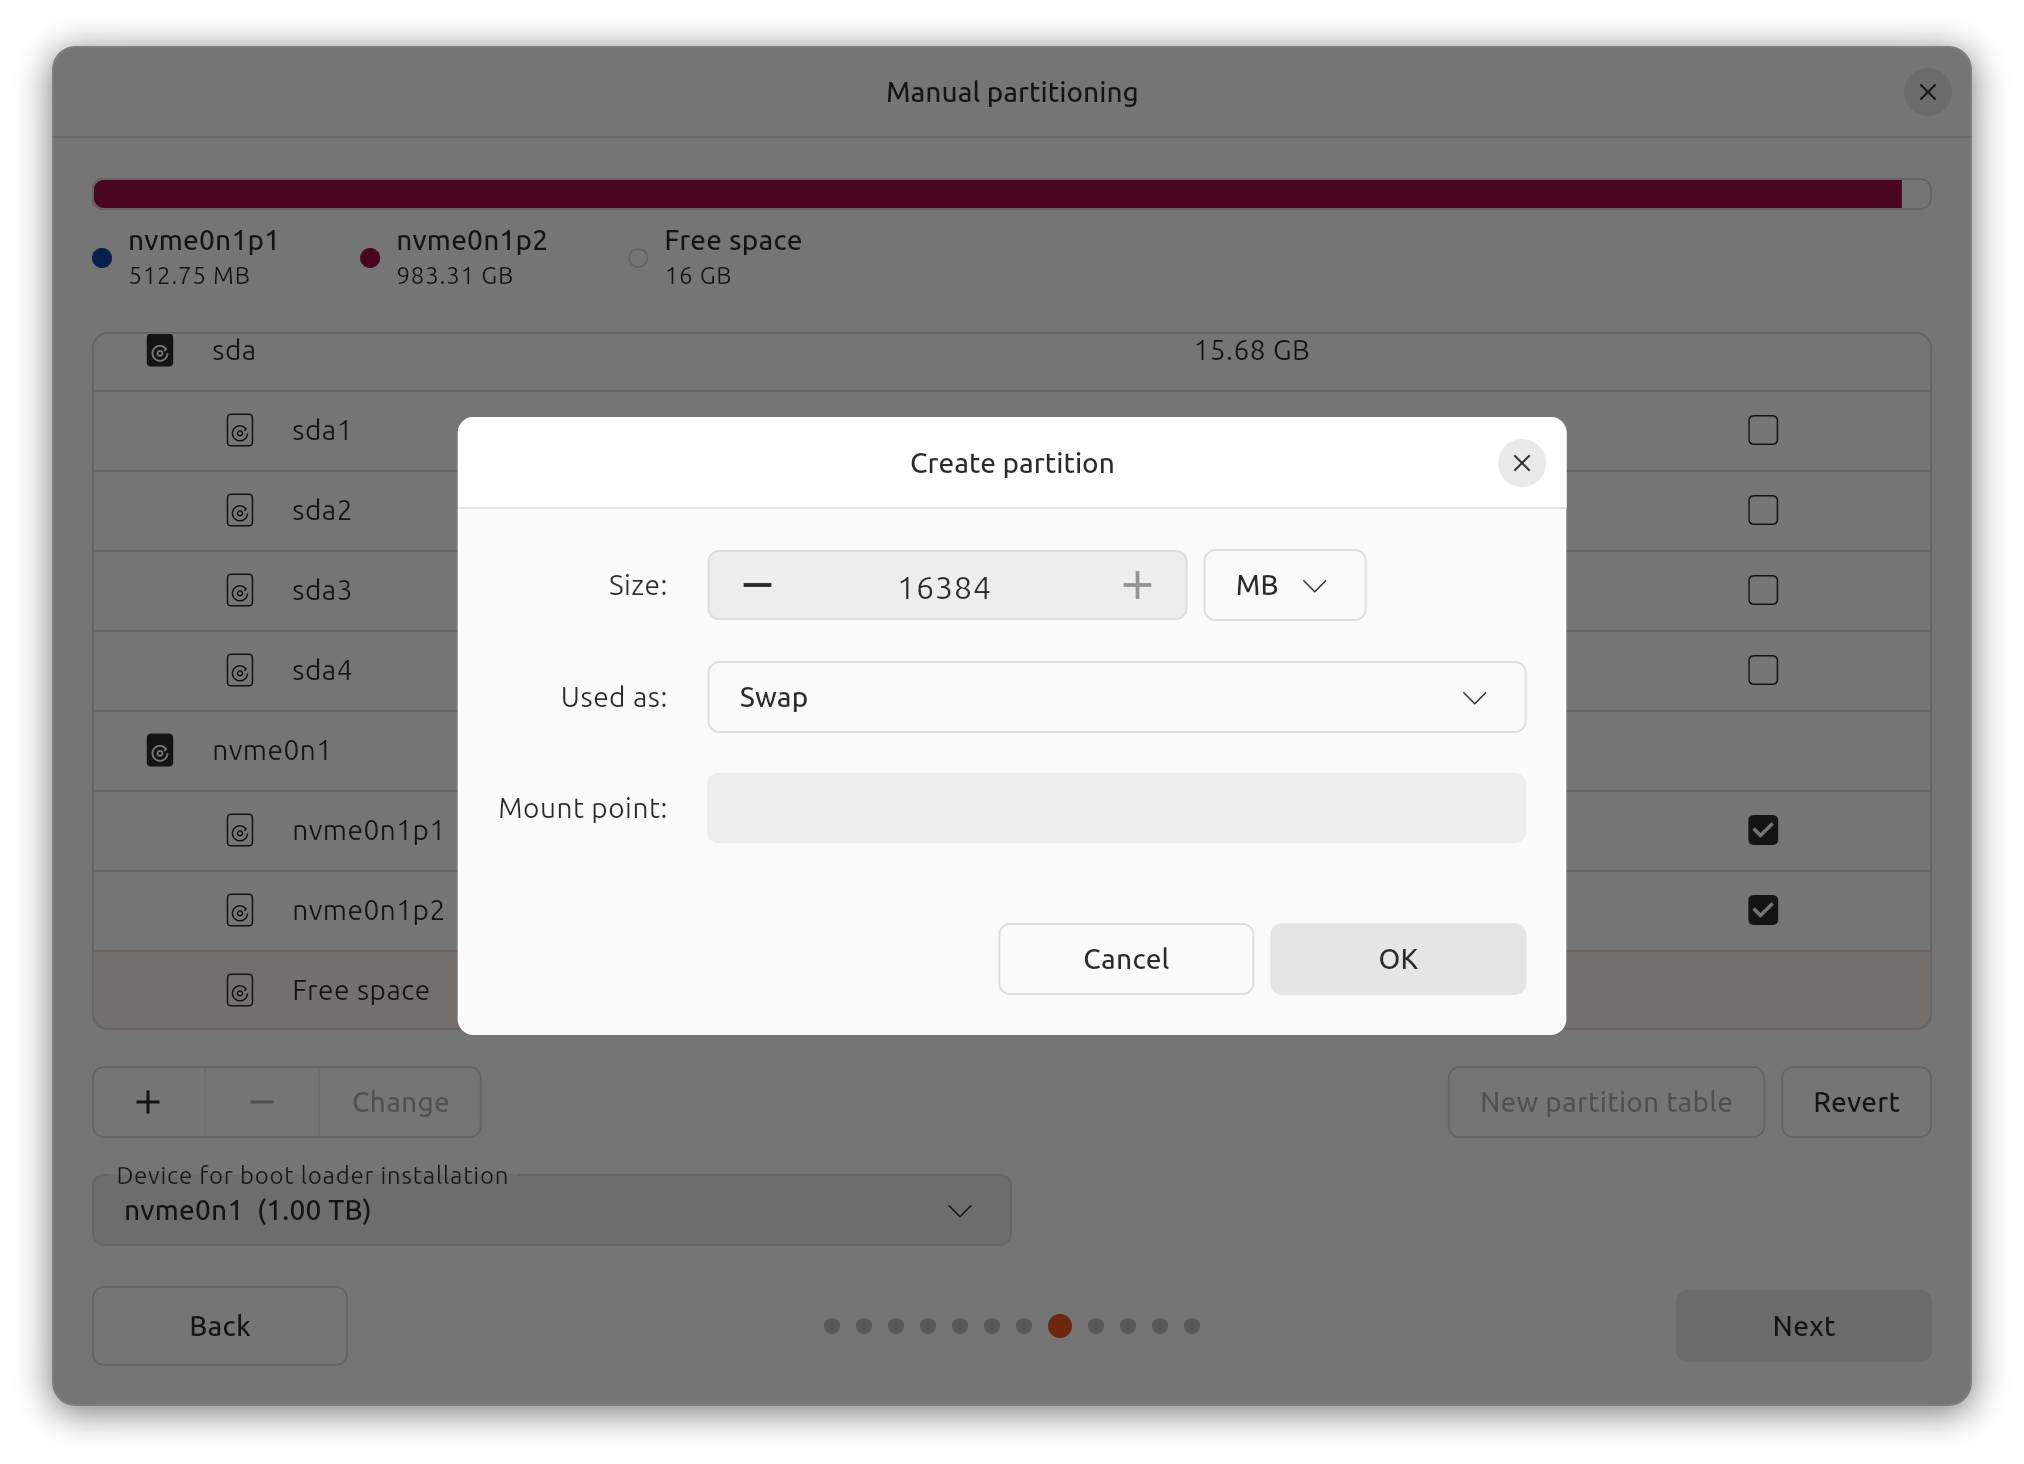
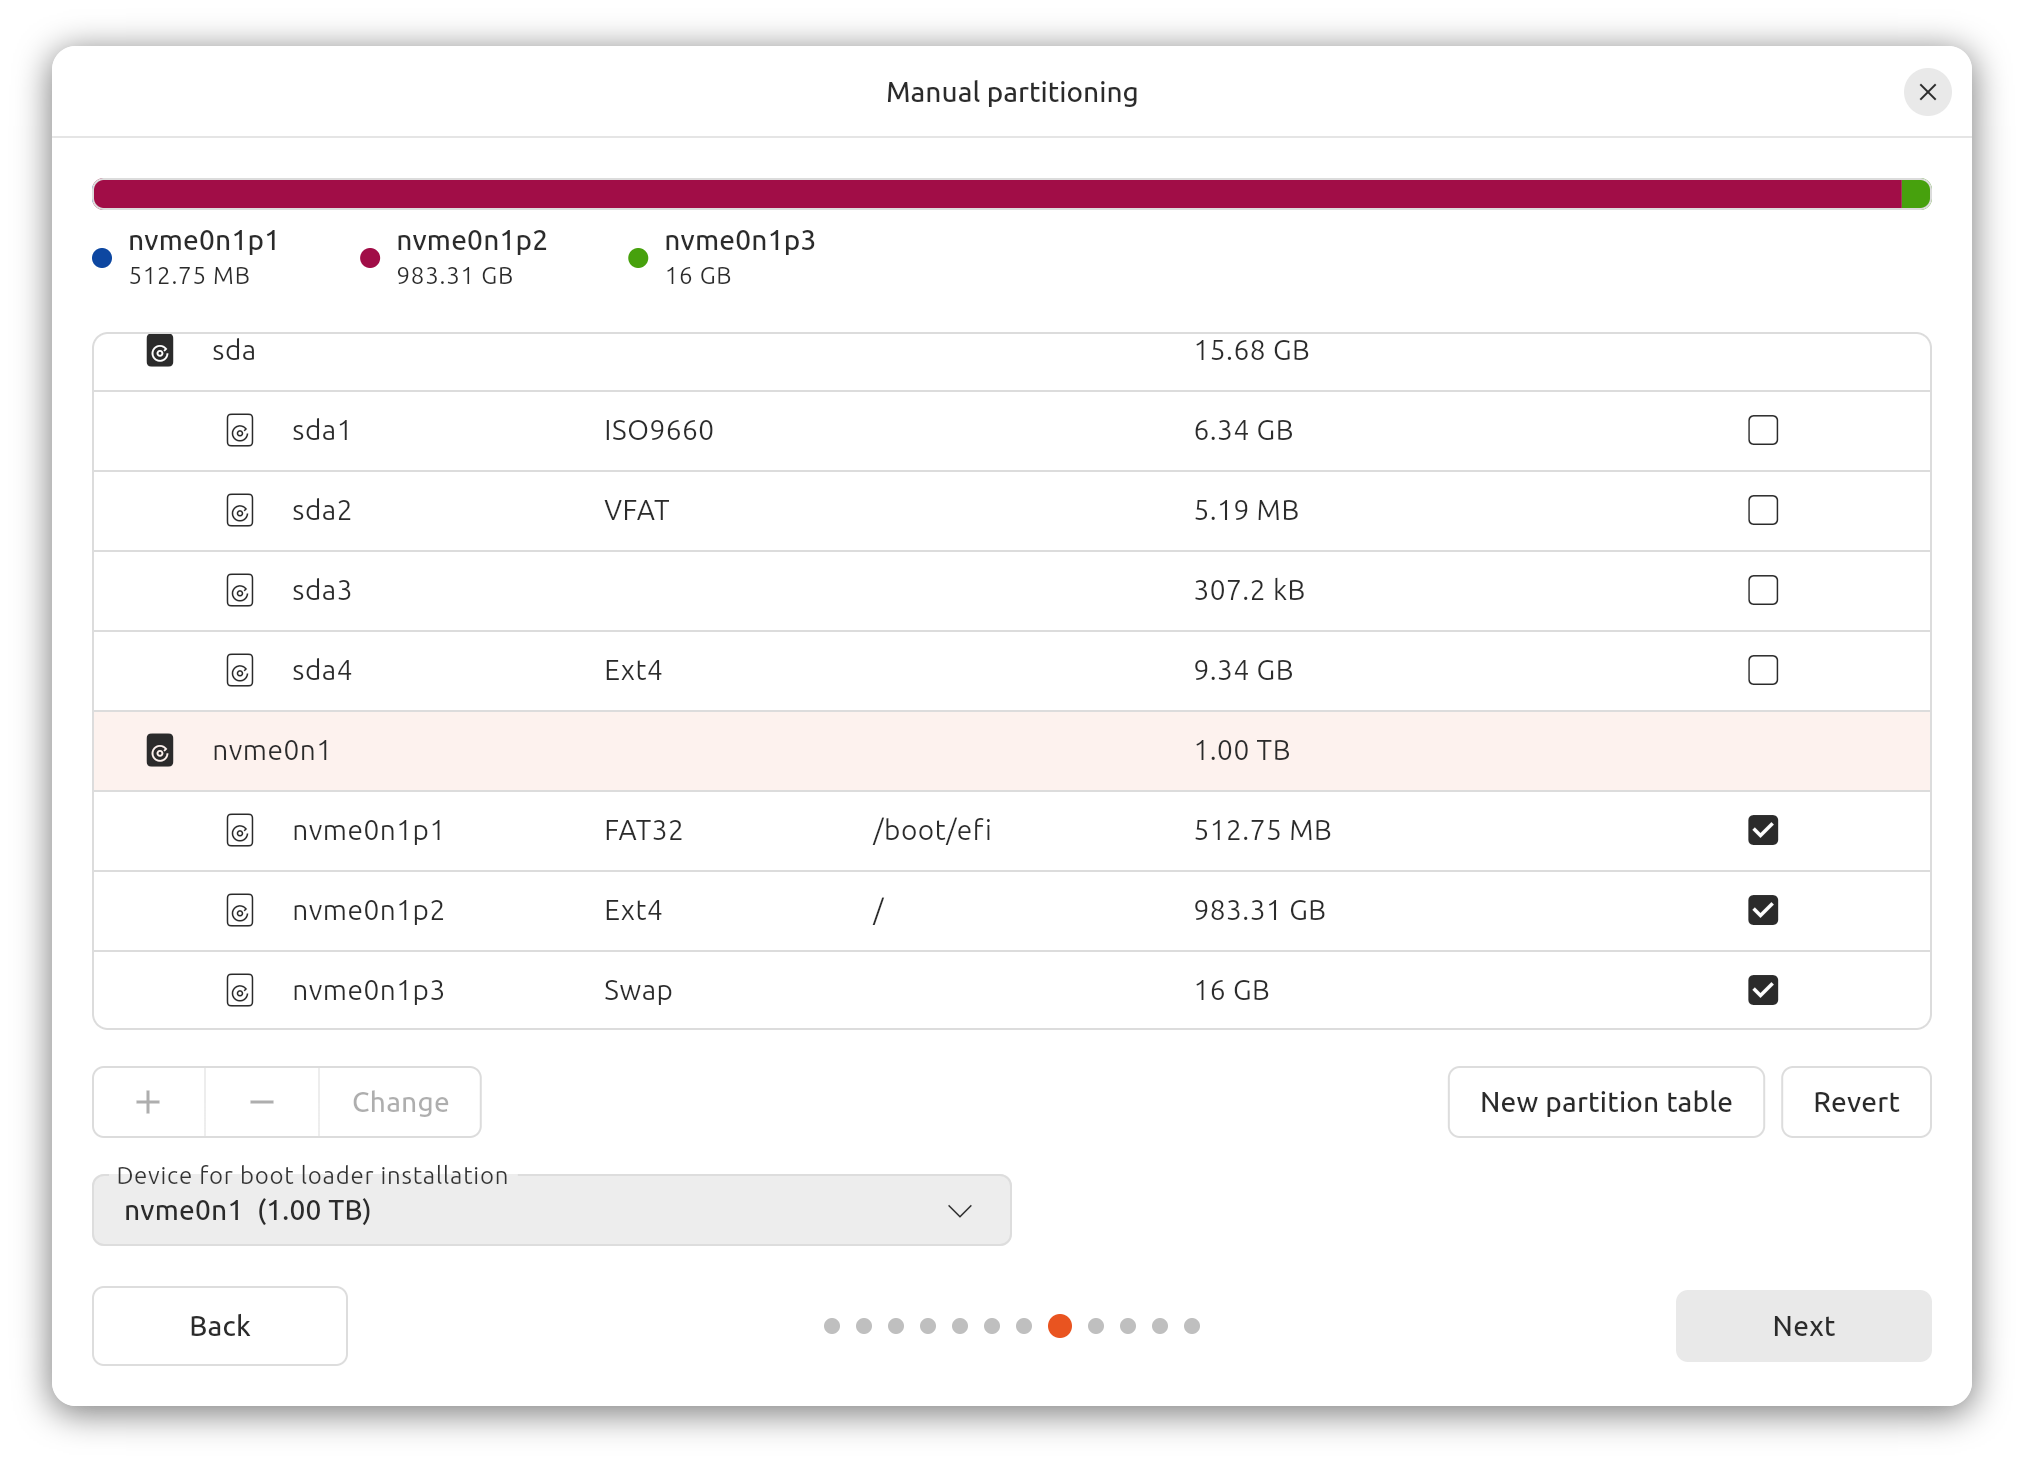
-
SSD partitions
-
512MB EFI System Partition
-
/root (remaining of the disk free available size minus, e.g., 16GB for swap area)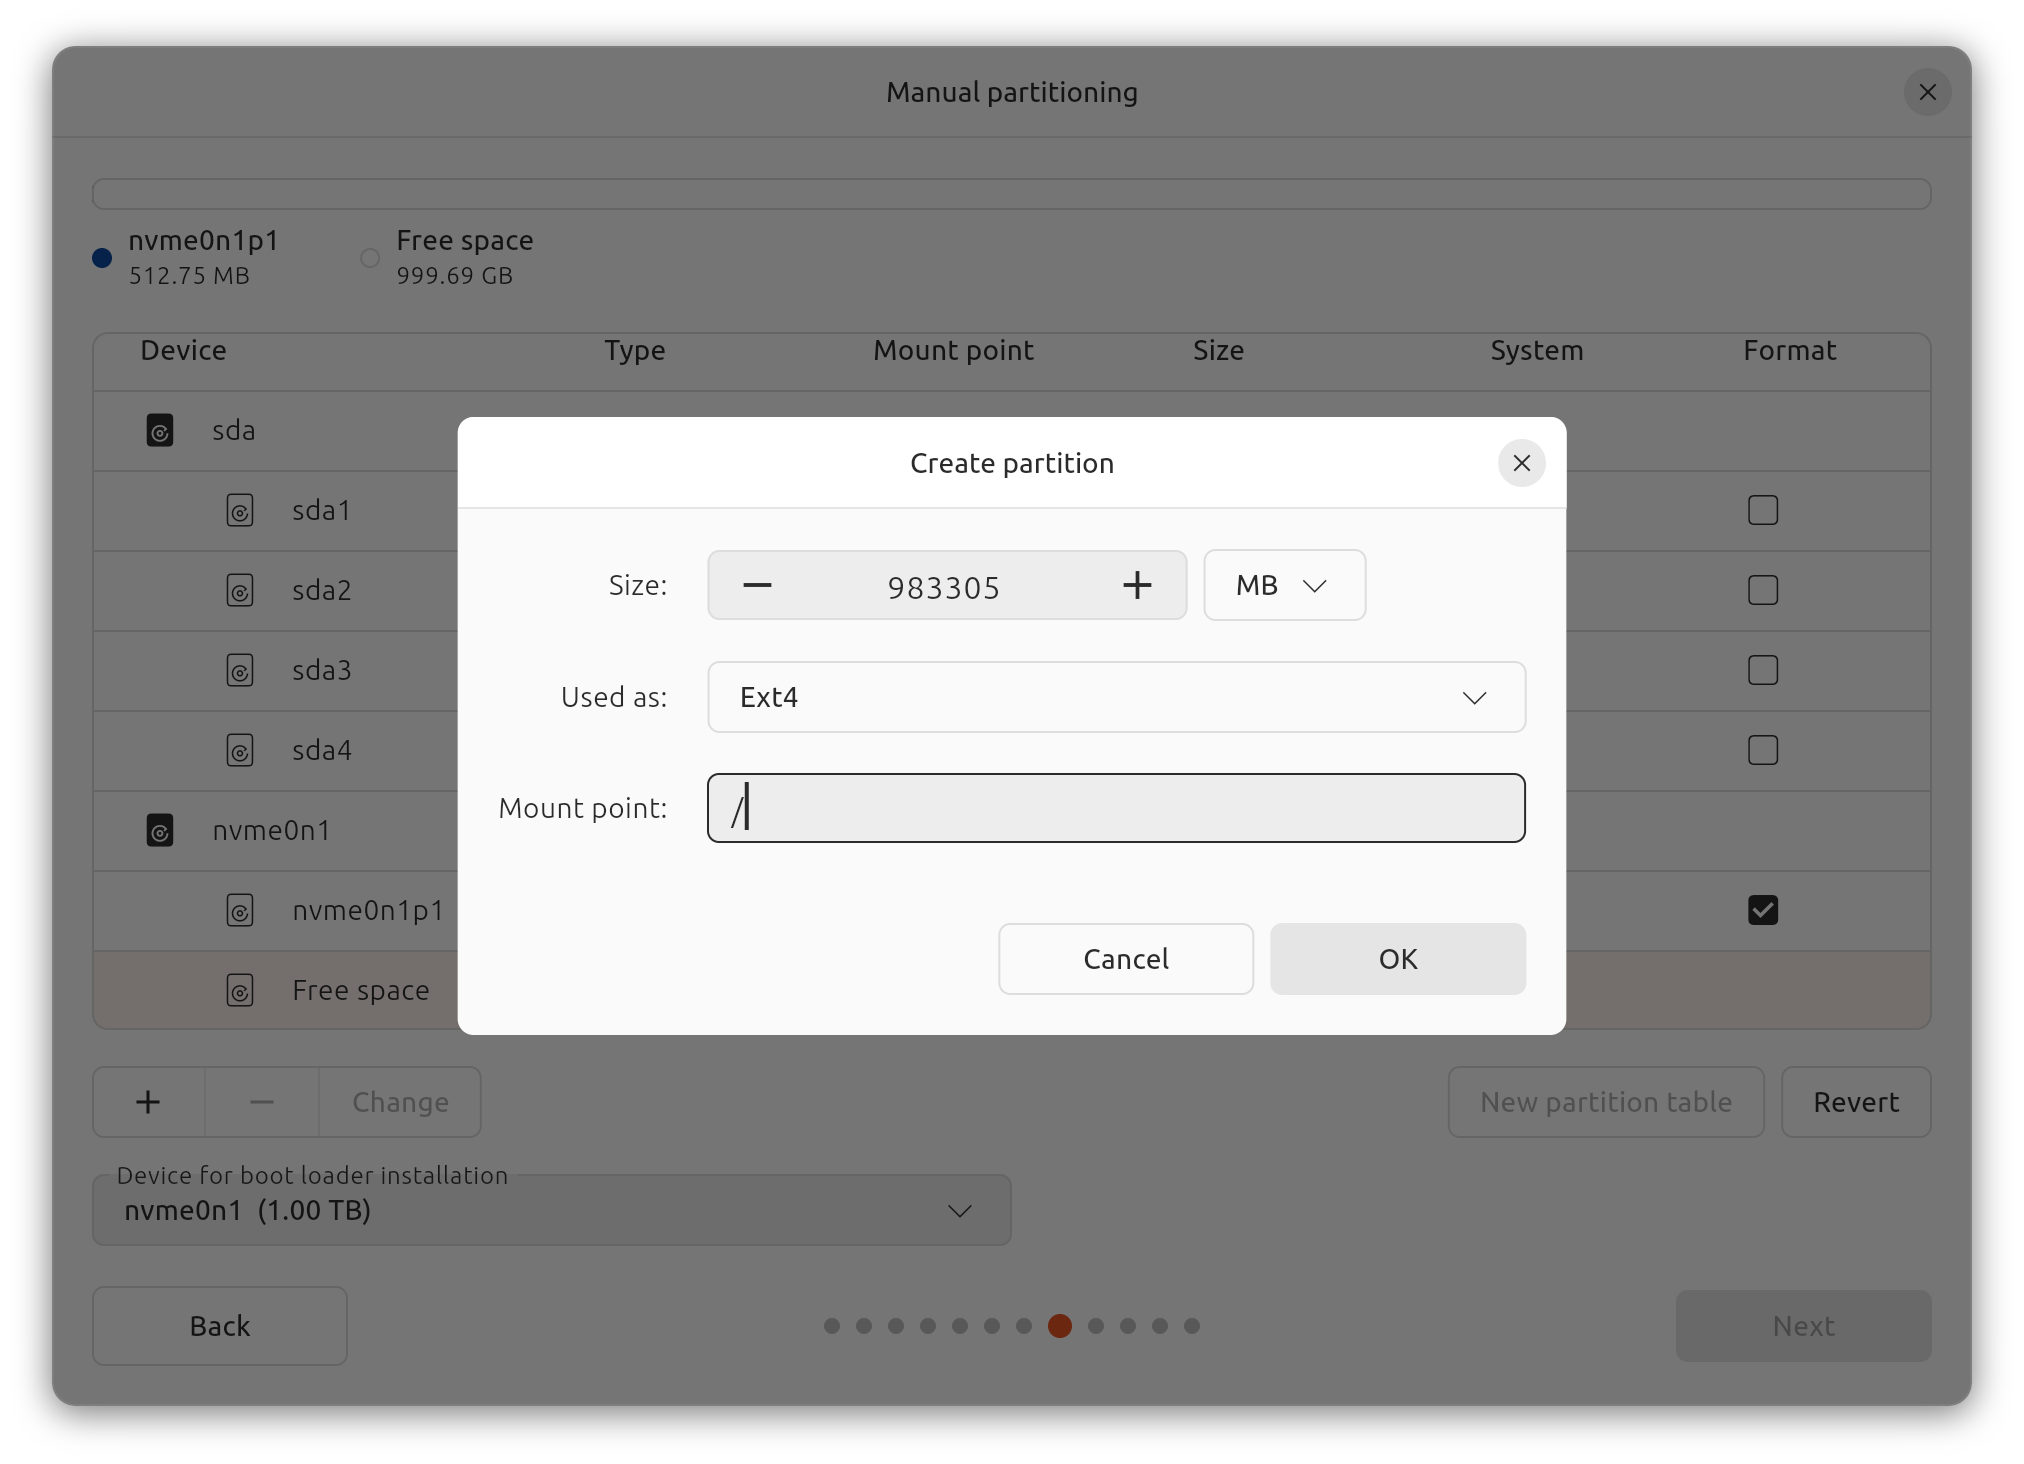
-
Swap area (~16GB)
-
-
Final partition scheme
- Remove all pre-existing partitions in the disk device used for the OS
installation (
-
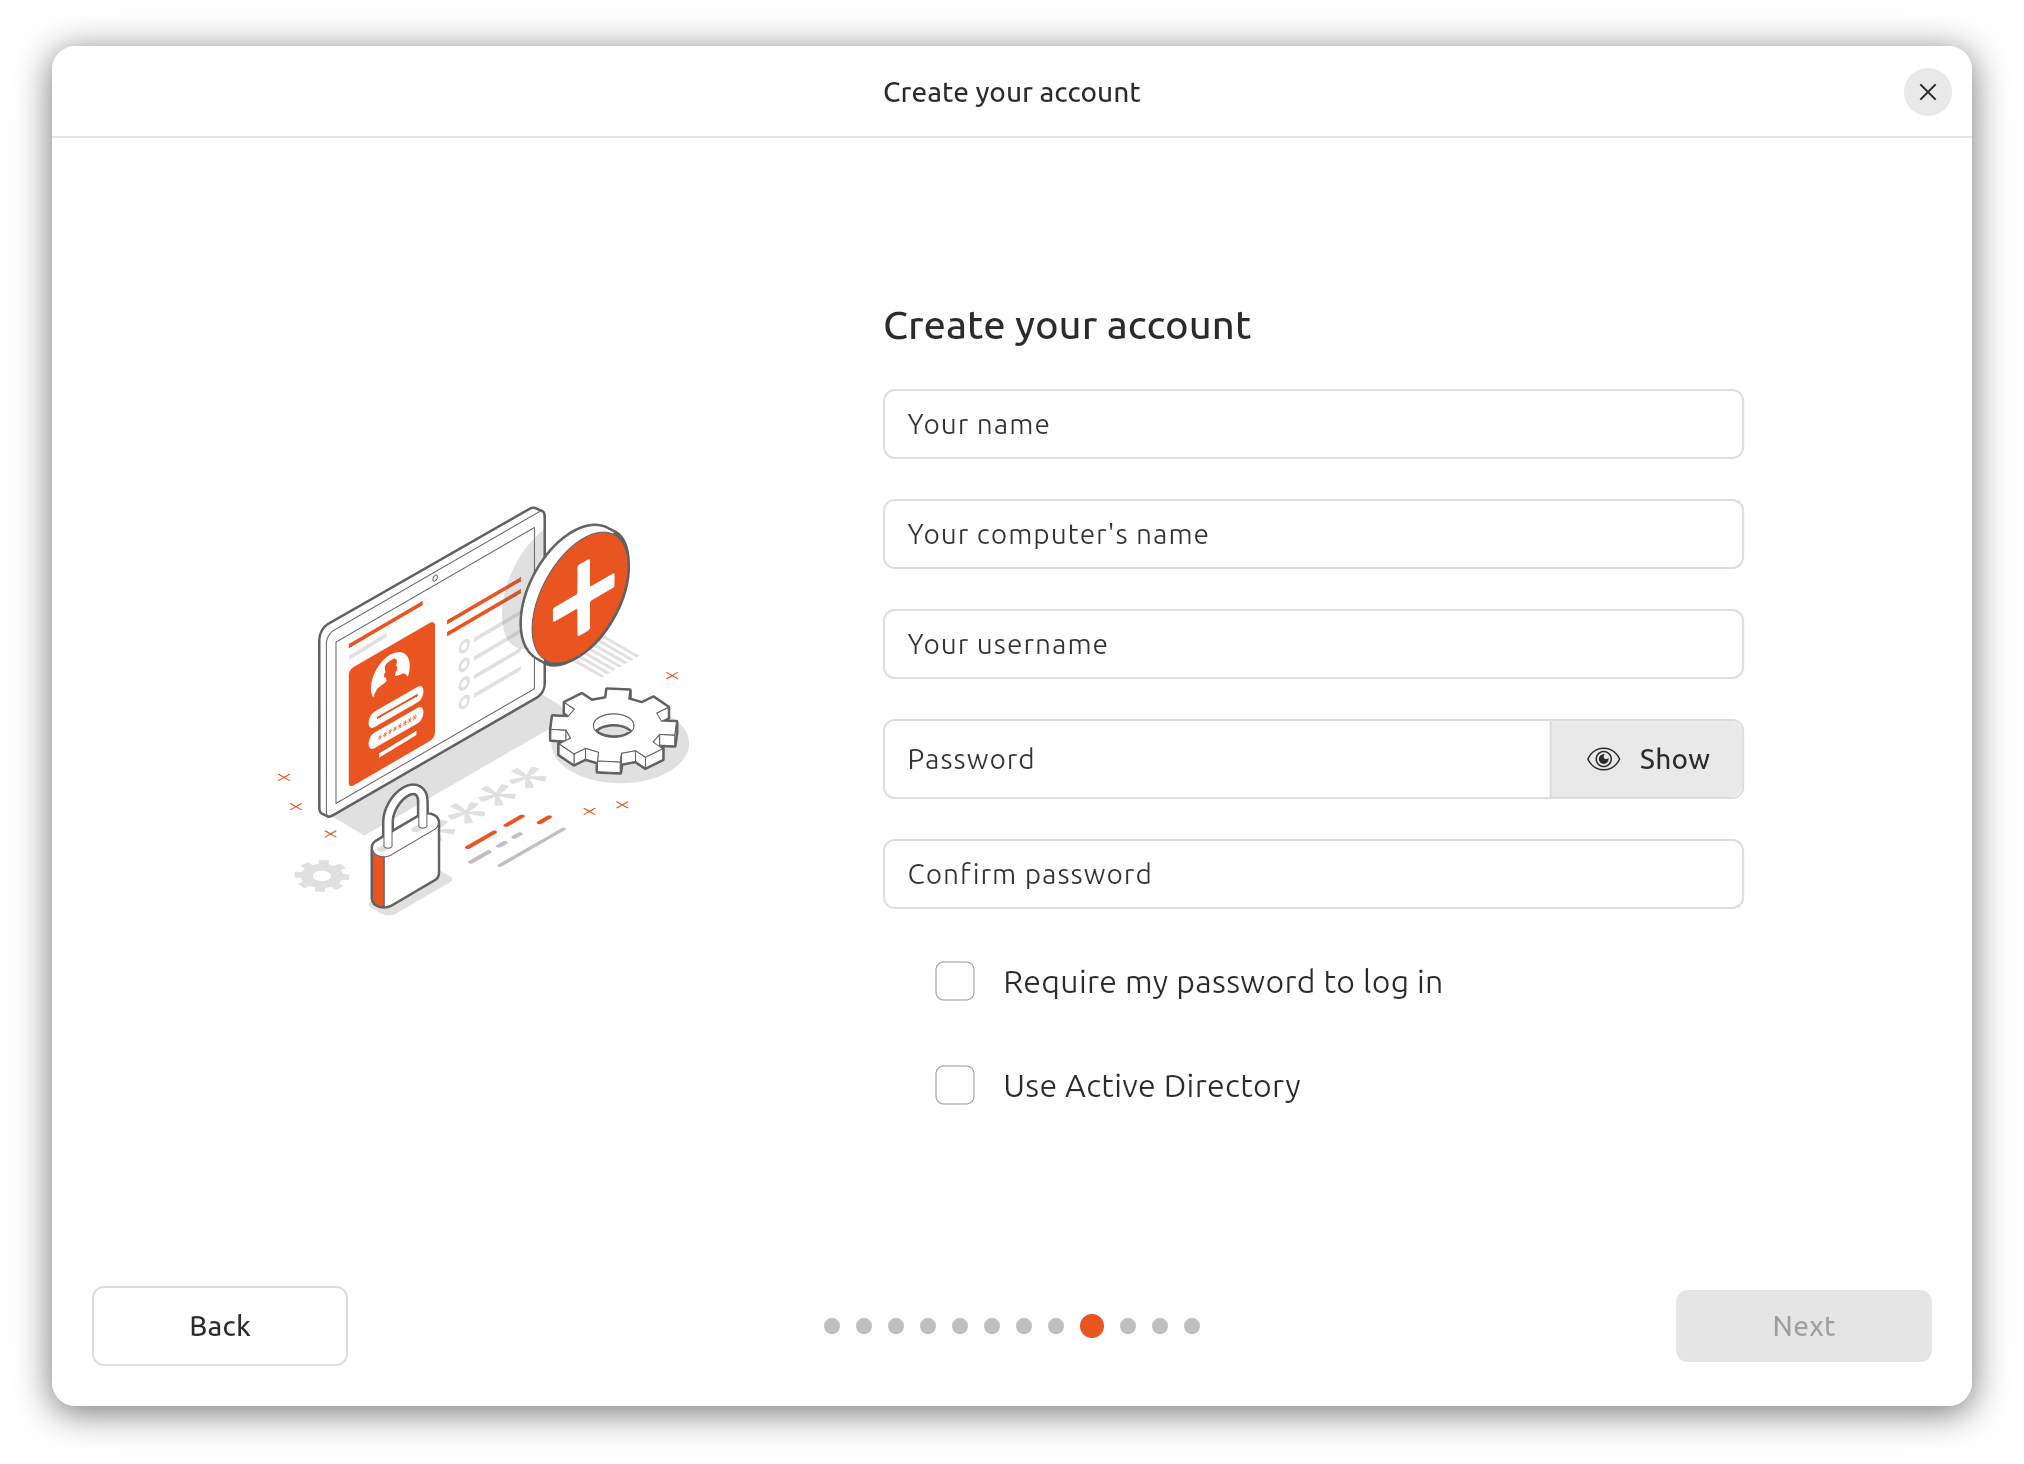
Create your account and setup the computer information settings
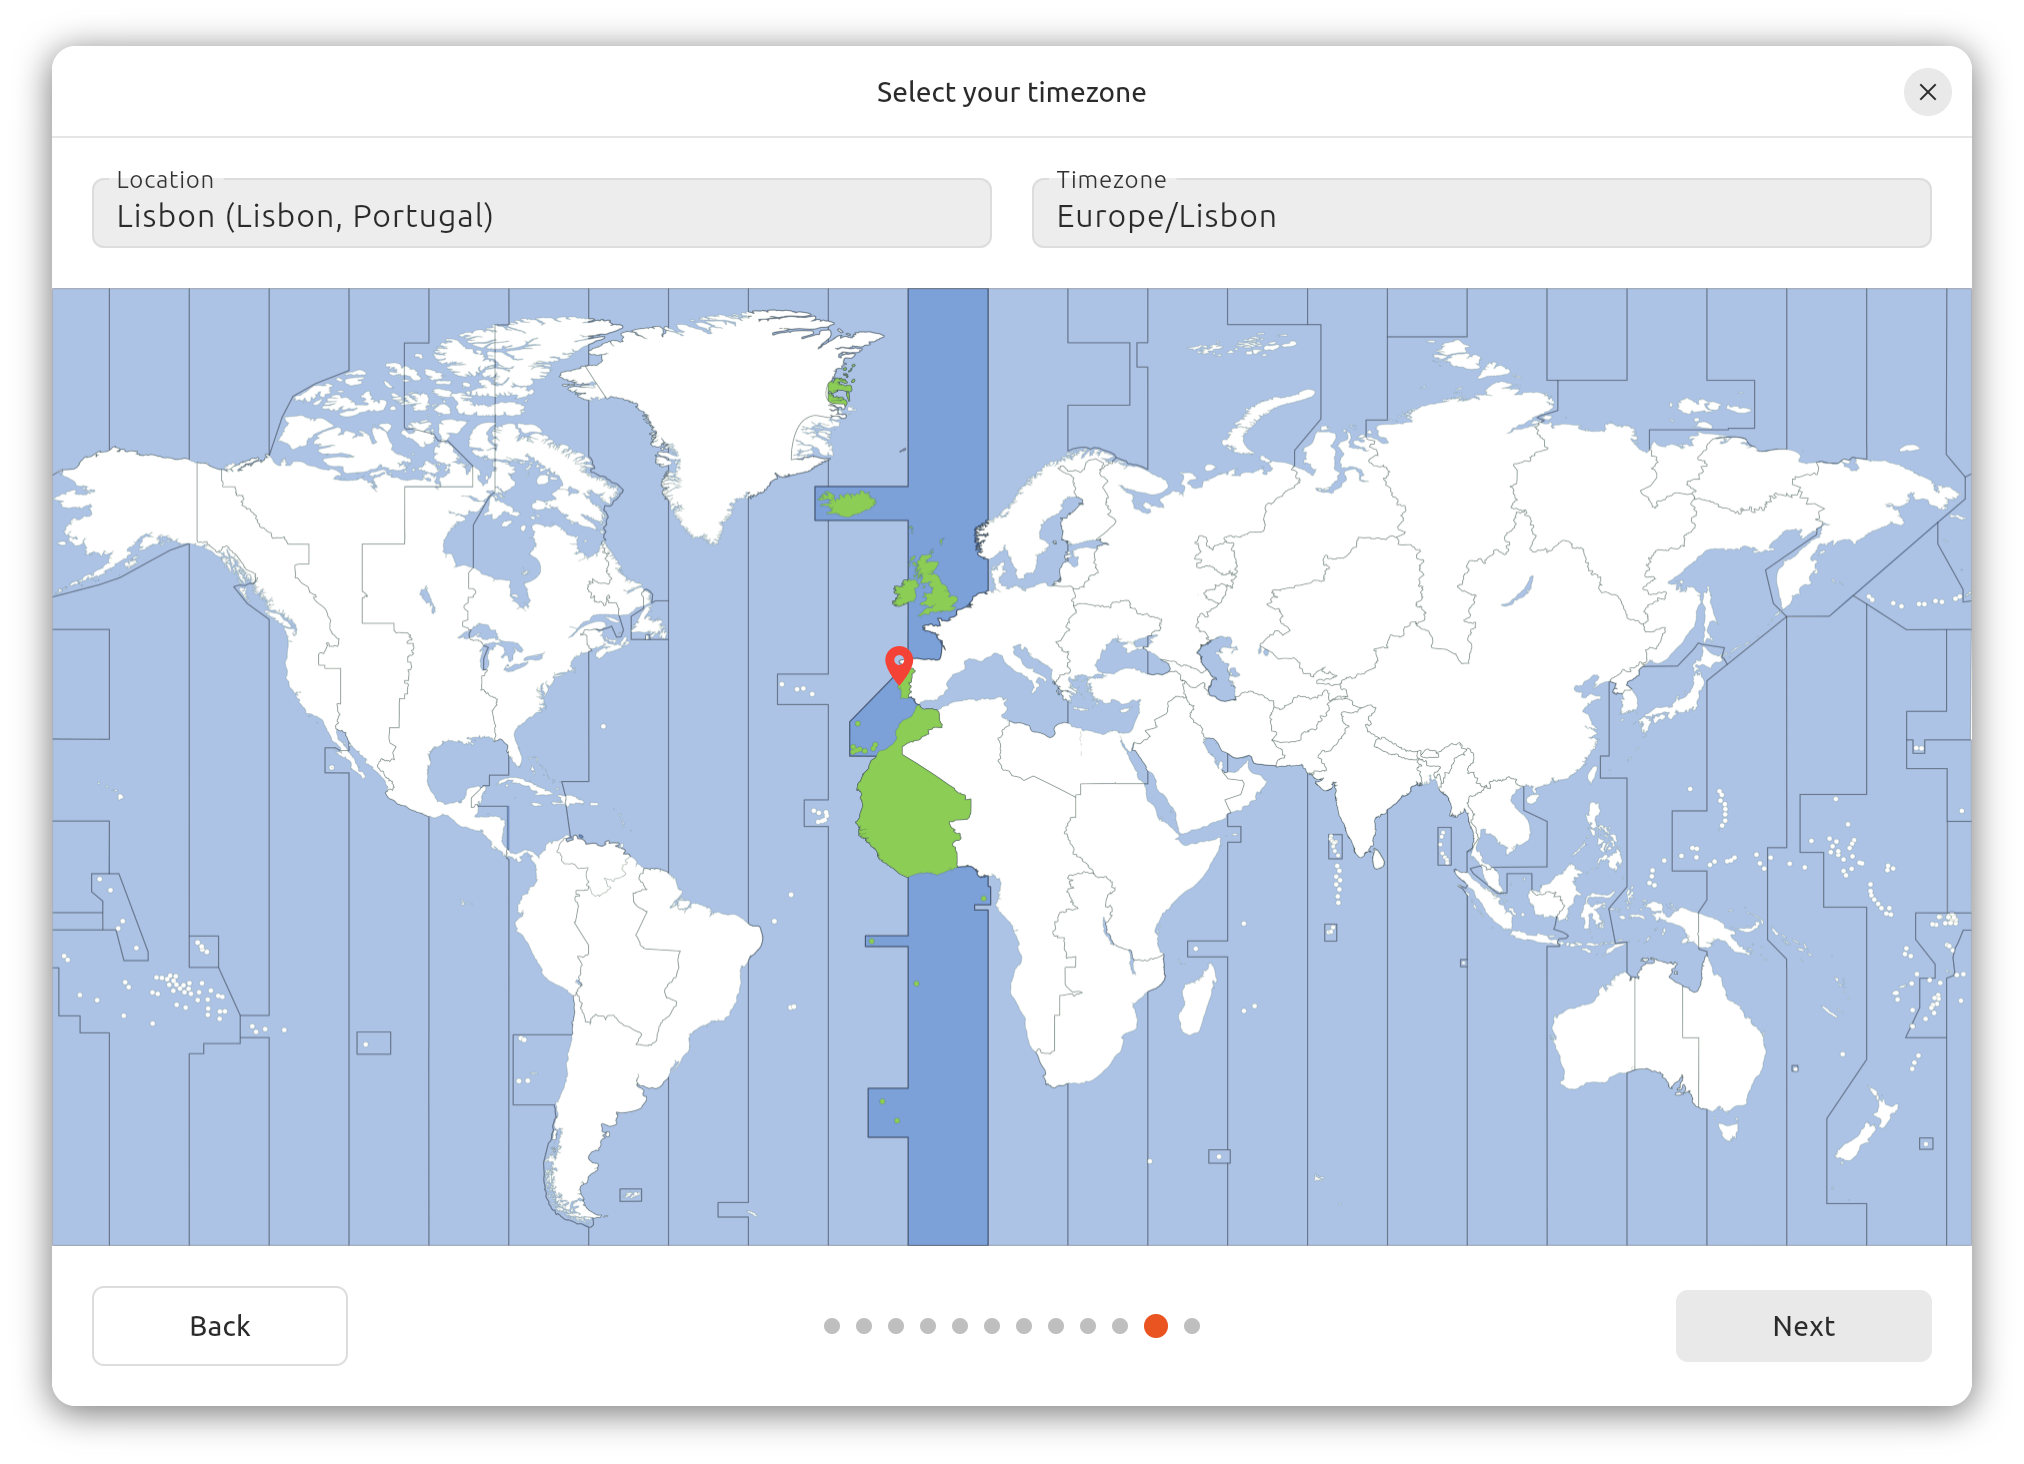
- Select your timezone
- Review your installation choices
- Restart the computer when the installation finishes
- Only remove the installation medium (USB stick) when appearing Please remove the installation medium, then press ENTER
Setup
- Open Settings
- Task Bar Settings
- Dock Show Applications Settings
- Power
- Power: Select Performance (high performance and power usage) mode
- Power Saving
- Disable Dim Screen (to avoid reducing the screen brightness)
- Disable Screen Blank setting it to Never (does not turn off the screen upon inactivity)
- General: Enable Show Battery Percentage
- Privacy & Security
- Screen Lock
- Disable Blank Screen Delay setting it to Never
- Disable Automatic Screen Lock (does not lock the screen after it blanks)
- Disable Lock Screen Notifications
- Screen Lock
- Multitasking
- Workspaces: Select Fixed Number of Workspaces and set 4 workspaces
- Multi-Monitor: Select Workspaces on all displays
- Appearance: Select Dark mode
- Ubuntu Desktop
- Desktop Icons: Set Size to Small
- Dock: Set Icon Size to the minimum (occupies less space)
- Keyboard
- Keyboard Shortcuts:
- Home folder: Super+E
- Keyboard Shortcuts:
Update
sudo apt update
sudo apt dist-upgrade